
When you start a new WordPress website, one of the first things you’ll want to do is choose a theme. Soon after that, you’ll probably want to start making changes to the theme to suit your website. To do this, you’ll need to create a custom child theme. It’s quite easy to do and it’s worth getting it right.
Follow this quick tutorial to create your own custom child theme for your WordPress website…
What is a WordPress Theme?
Put simply, A WordPress theme is just a collection of files. Some of these files are optional, but you’ll need to create the required core files. A very simple custom child theme might look something like this.

The file you need to get absolutely right is style.css, as this is what WordPress will look for to figure out what your theme’s called, and how it should deal with your theme.
You should also have a functions.php file, but it can be empty when you start things off.
The screenshot.png is optional, and it’s just a thumbnail picture of what your theme might look like. It can just be something really simple. You can right-click and “save as…” this image, if you need something to start your new theme.

Choose Your Parent Theme
When you’re starting your shiny new website, you’ll probably go through some standard actions:
- Make sure WordPress is installed and fully up-to-date.
- This bit’s really important – always keep WordPress up-to-date!
- Install some standard useful plug-ins:
- WP GDPR Compliance
- A cookie consent plugin
- Maintenance
- Choose a base/parent theme for your website. Good base themes include:
- Astra
- A great, modern, all-round theme that has a fast page-load-speed. Excellent for developers and designers.
- OnePress
- Simple-to-use theme with a high-impact front-page. Great for simpler sites & blogs, and it can also be used for WooCommerce shop websites.
- Storefront
- An official theme for WooCommerce-based shop websites. Fully-featured and easy to extend. Well-supported on the web with lots of how-to guides.
- Astra
- Create and activate a child theme for your website, that’s based upon your base theme.
- This is a place where you can put your modifications, and the things that make your website different from the base theme.
- This is what we’ll be covering next.
Install the Base Theme
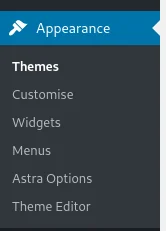
We’ll use Astra as our base theme, but the instructions are the same no matter what base theme you choose. In your website’s admin area, go the Appearance menu and select Themes.
You should see an “Add New” button at the top of the page… Click Add New, find the theme you want to use as your base theme and click the Install button. You don’t need to activate the theme, because we’re only going to use this as our base theme. We’re going to make our own custom child theme that inherits from this base theme.
Create a Custom Child Theme
First off, we need to create a few files and put them into a zip file. We can then upload the zip file to our website as a new theme.
Create a folder on your computer with the name of your new theme. Make sure to use only lowercase letters, and don’t use any spaces. Create 2 files in here called functions.php and style.css. Save the screenshot.png file above into your new folder too, so it should look like this.

To make sure that WordPress knows how to deal with your theme, we need to put some content into style.css. Edit style.css and paste the following code into it.
/*
 * Theme Name:   My Website Theme
 * Theme URI:    https://your-website-goes-in-here/
 * Description:  Custom theme for my website - change this.
 * Author:       WP Tutorials
 * Author URI:   https://wp-tutorials.tech/
 * Template:     astra
 * Version:      1.0.0
 * License:      GNU General Public License v2 or later
 * License URI:  http://www.gnu.org/licenses/gpl-2.0.html
 * Text Domain:  mywebsitetheme
 */

/* Your CSS goes here... */
/* ... */
/* ... */
The format is pretty straightforward and you can change whatever you want in here. These are the important bits…
| Key | Value |
|---|---|
| Theme Name | Important: The regular name of your theme. |
| Description | Just a description of your theme. Not really important if it’s a one-off child theme for a specific site. |
| Text Domain | Used when you use the __() function for translatable strings. Not important if your theme is only for a single-language site. |
You should also create a basic functions.php file, like this one:
<?php

/**
 * Custom functions for my child theme.
 *
 * https://wp-tutorials.tech/getting-started-with-wordpress/create-a-wordpress-child-theme/
 */

// Block direct access.
defined('WPINC') || die();

// The directory this file is in (i.e. the child theme's directory).
$base_dir = dirname(__FILE__);

// Uncomment this if you want to use a settings.php file.
// require_once $base_dir . '/settings.php';

// Other functions files can go here...
// require_once $base_dir . '/functions-shortcodes.php';
// require_once $base_dir . '/functions-rest-api.php';
// ...

function custom_enqueue_scripts() {
	$theme_version = wp_get_theme()->get('Version');
	$base_uri = get_stylesheet_directory_uri();

	wp_enqueue_style('child-style', $base_uri . '/style.css', false, $theme_version);

	// You can add additional JavaScript CSS files here...
	// wp_enqueue_style('my-post-styles', $base_uri . '/post.css', array('child-style'), $theme_version);
	// wp_enqueue_style('my-shop-styles', $base_uri . '/shop.css', array('child-style'), $theme_version);
}
add_action('wp_enqueue_scripts', 'custom_enqueue_scripts', 99);
There’s just enough in here to get your child theme up-and-running. It’ll load your child theme’s style.css file, and you can see where other functions and CSS/JavaScript files.
Upload & Install your Custom Child Theme
All we need to do now is zip it, upload it and activate it… When you create a zip file of your custom child theme, make sure that you zip the folder itself. Because our theme’s folder is called “mywebsitetheme”, our zip file will be called “mywebbsitetheme.zip“.
In your website’s WordPress admin area, go to the Appearance > Themes area and hit the “Add New” button at the top. Now, instead of searching & browsing the available online theme library, press the “Upload Theme” button. Select your theme’s zip file and press “Install Now“

After you’ve uploaded your custom child theme, you’ll need to Activate it for it to “kick in”.
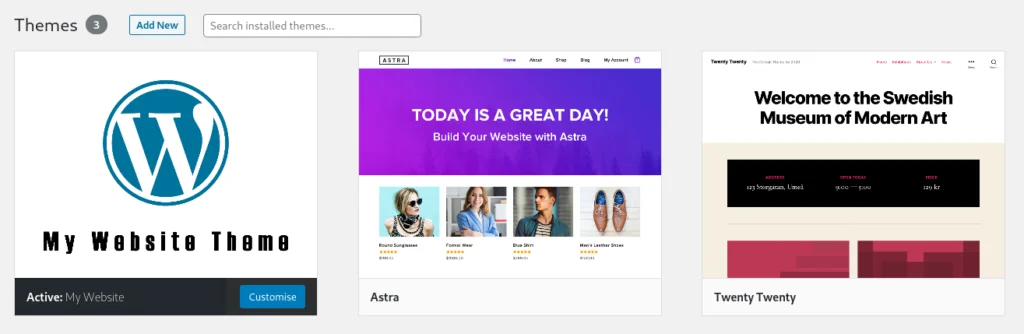
When you’ve finished, your Appearance > Themes area should look something like this:
When you want to add custom styles to your theme’s style.css, or new functions to your functions.php, all you need to do is us the built-in Theme Editor. In the WordPress admin area, just go to Appearance > Theme Editor. There’s a built-in PHP editor where you can paste code into your functions.php file. You can also make CSS styles additions directly in your theme’s style.css, if you don’t want to use the WordPress Customizer.
There you have it. You’ve created a custom child theme for your new WordPress site.

