
It’s easy enough to keep adding functions to your WordPress website by pasting code into your child theme’s functions.php file. Sometimes, though, it’s good to create something a little more permanent. Maybe add a feature that transcends the theme, and you can also deploy to your other WordPress sites. This tutorial covers how to create a simple custom WordPress plugin to display our posts in a grid.

Although you can just copy-and-paste the bits of code if you want to, we’re going to cover a bit of the programming process here too. How do you go from an idea and a blank canvas, to having some working code that does cool stuff.
You should have access to a WordPress installation that has a custom child theme, and the site will need a fairly current version of PHP behind-the-scenes.
The WordPress Plugin Handbook is your friend, too.
Keep it Simple
When you start creating something like a custom plugin, it’s tempting to just keep adding features here-and-there because… you can. Be careful though, because it’s really easy to accidentally create a spaghetti-code monster. Something that’s a mess to follow, and impossible to understand when you go back to look at it in a year’s time.
So… we’re going to make a simple plugin that does just one thing, and does it well:
- We’re going to create a new shortcode to display Posts in a grid layout.
- The grid layout tools will come from the industry-standard Bootstrap 4.
- Our plugin will import the Bootstrap assets from a CDN.
- If your site/theme already includes Bootstrap, then we should be able to it instead of fetching Bootstrap in our plugin.
- Our custom shortcode for displaying posts in a grid will be able to take some parameters like:
- How many columns
- Maximum number of posts to display
- Post Type
- Category (or categories)
- We’ll be able to customise the post grid layout with template snippets in our custom child theme.
Let’s Write some Code
Our plugin’s folder and file structure is going to be pretty simple. We’re just going to use some basic functions and hooks – we’re not going to go into Model-View-Controller or even basic object-oriented structure here. Create the following structure on your desktop/laptop. You can just do this on your Desktop if you want.
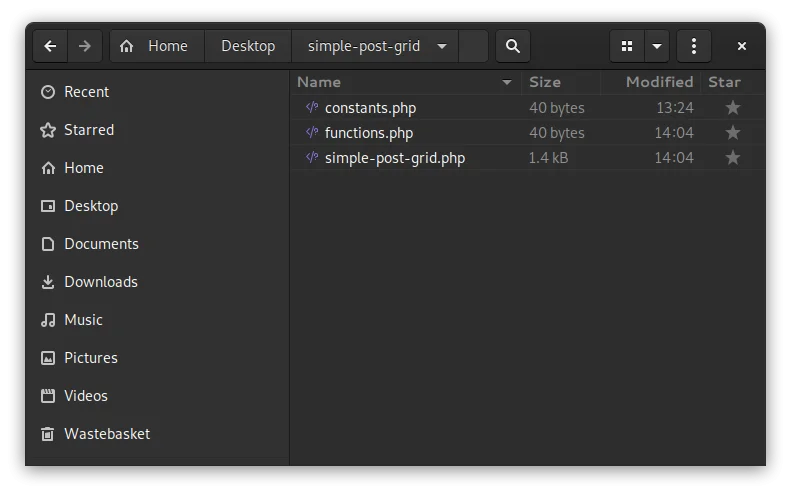
The main plugin file is simple-post-grid.php. The other two files contain constants and functions that can be accessed both by your custom child theme AND by our plugin.
Here’s the initial content for constants.php and functions.php. We’ll add more into these later on.
<?php

/**
 * FILE: constants.php
 */

// Block direct access.
if (!defined('WPINC')) {
    exit('Do NOT access this file directly.');
}

// Bootstrap assets.
define(
    'SGP_BOOTSTRAP_CDN_CSS',
    'https://maxcdn.bootstrapcdn.com/bootstrap/4.0.0/css/bootstrap.min.css'
);
define(
    'SGP_BOOTSTRAP_CDN_JS',
    'https://maxcdn.bootstrapcdn.com/bootstrap/4.0.0/js/bootstrap.min.js'
);
<?php
/**
* FILE: functions.php
*/
// Block direct access.
if (!defined('WPINC')) {
exit('Do NOT access this file directly.');
}
// TODO...And here’s the code for simple-post-grid.php, to get us started with our actual plugin.
<?php
/**
 * Plugin Name:  Simple Post Grid
 * Plugin URI:   https://headwall-hosting.com/
 * description:  Display post summaries in a simple responsive grid.
 * Version:      1.0.0
 * Author:       Paul
 * Author URI:   https://headwall-hosting.com/docs/
 * License:      MIT
 * Text Domain:  simple-post-grid
 */

/**
 * [[ Notes ]]
 *
 * Bootstrap: If your theme already includes Bootstrap, add this to your child
 * theme's functions.php :
 * add_filter( 'spg_is_bootstrap_required', '__return_false' );
 */

// If this file is called directly, abort.
if (!defined('WPINC')) {
	die;
}

define('SIMPLE_POST_GRID_VERSION', '1.0.0');

/**
 * Any local dependencies can go here.
 */
require_once 'constants.php';
require_once 'functions.php';

/**
 * Do we need to do anything special to do during activation?
 */
function spg_activate_plugin() {
	// ...
}
register_activation_hook(__FILE__, 'spg_activate_plugin');

/**
 * Do we need to do anything special to do during deactivation?
 */
function spg_deactivate_plugin() {
	// ...
}
register_deactivation_hook(__FILE__, 'spg_deactivate_plugin');

/**
 * Add the Bootstrap 4 assets.
 */
function spg_enqueue_bootstrap() {
	$is_bootstrap_required = apply_filters(
		'spg_is_bootstrap_required',
		SPG_IS_DEFAULT_BOOTSTRAP_REQUIRED
	);

	if ($is_bootstrap_required) {
		wp_enqueue_style('bootstrap-css', SGP_BOOTSTRAP_CDN_CSS);
		wp_enqueue_script('bootstrap-js', SGP_BOOTSTRAP_CDN_JS, array('jquery'));
	}
}

/**
 * This is our main entry-point, where we put all the logic that runs every
 * page-load. This is really for registering filters and hooks.
 */
function spg_run() {
	// Add requried CSS and JS.
	add_action('wp_enqueue_scripts', 'spg_enqueue_bootstrap');
}

/**
 * Call our plugin's main entry-point function.
 */
spg_run();
Now you just need to zip-up the containing folder (simple-post-grid) and upload it to your WordPress website from the “Upload Plugin” button on the Plugins page, in the Admin Area. When you’ve done that, you should see your new plugin in the list of installed plugins, like this.

Now you can just click on Activate, to get the plugin up-and-running! To make code-changes to the plugin, you can use WordPress’ built-in plugin editor, under the Plugins menu.
Create some Scaffolding
We’re going to create a custom shortcode in our plugin, and the shortcode-handler will call some other functions to render the relevant HTML. So we need to figure out which order to do things. First, let’s create a page on our WordPress site where we can add our shortcode. It doesn’t really matter what you call it – we just need somewhere to test our new custom shortcode.

I’ve called our new shortcode “spg_posts“, which doesn’t exist yet, but it will do soon. We’re going to pass the number of columns we want to see, and we’ve specified “no category” here. We could just not specify the category parameter too, but I’ve put it in the test page to make it easy for us to come back and test it later.
Next, open the file functions.php in your simple-post-grid plugin and add the function that’s going to do most of the hard work in our plugin.
<?php
/**
* FILE: functions.php
*/
// Block direct access.
if (!defined('WPINC')) {
exit('Do NOT access this file directly.');
}
/**
* Return the HTML for our posts grid.
*/
function spg_get_posts_html($params) {
$html = '';
$html .= '<p>';
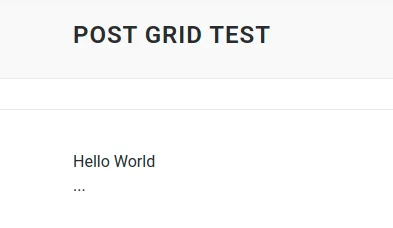
$html .= 'Hello World<br />';
$html .= '...';
$html .= '</p>';
return $html;
}
Now lets register our custom shortcode. Edit the simple-post-grid.php file and change the spg_run() function, like this:
/**
 * This is our main entry-point, where we put all the logic that runs every
 * page-load. This is really for registering filters and hooks.
 */
function spg_run() {
	// Add requried CSS and JS.
	add_action('wp_enqueue_scripts', 'spg_enqueue_bootstrap');

	// Register the shortcode to render a simple post grid.
	add_shortcode('spg_posts', 'spg_get_posts_html');
}
Make sure all your files are saved, then point your browser at your Post Grid Test page. You should start to see signs of life…
Adding some Substance
It’s time to get stuck-in to the main function of our plugin and write the code to go in spg_get_posts_html(). First, though, let’s put a couple of helpful bits into constants.php – some helpful defaults, fall-back values and magic strings.
<?php

/**
 * FILE: constants.php
 */

// Block direct access.
if (!defined('WPINC')) {
	exit('Do NOT access this file directly.');
}

// Set this to true if you want to see useful diagnostics.
define('SPG_IS_DIAGNOSTIC_ENABLED', false);

// Bootstrap assets.
define('SGP_BOOTSTRAP_CDN_CSS', 'https://maxcdn.bootstrapcdn.com/bootstrap/4.0.0/css/bootstrap.min.css');
define('SGP_BOOTSTRAP_CDN_JS', 'https://maxcdn.bootstrapcdn.com/bootstrap/4.0.0/js/bootstrap.min.js');

// Bootstrap 4 supports a grid of up to 12 columns.
define('SPG_MIN_COLUMN_COUNT', 1);
define('SPG_MAX_COLUMN_COUNT', 12);

define('SPG_DEFAULT_CONTAINER_CLASS', 'container');
define('SPG_DEFAULT_COL_CLASS_PREFIX', 'col-sm-');
define('SPG_DEFAULT_ROW_CLASS', 'row');

define('SPG_GRID_ITEM_TEMPLATE_PARTS_DIR', 'template-parts');
define('SPG_GRID_ITEM_TEMPLATE_PART_PREFIX', 'post-grid');

define('SPG_IS_DEFAULT_BOOTSTRAP_REQUIRED', true);

// A nice default column count.
define('SPG_DEFAULT_COLUMN_COUNT', 3);
If we try to use our shortcode without passing any parameters then it should still work, just using the default values in constants.php.
We’re going to use Bootstrap 4 to layout our posts in a grid. This will automatically make our HTML responsive to device size and orientation, which is cool. This means we need to enqueue the Bootstrap assets…
infoYour theme might already have access to Bootstrap 4, so we’ll include a filter that lets you override our code to include these assets. It’ll make sense when you see it in a moment. If you need to disable our automatic loading of Bootstrap, add this to your custom child theme’s functions.php.
// Stop the simple-post-grid plugin from loading Bootstrap.
add_filter( 'spg_is_bootstrap_required', '__return_false' );
Here’s the new functions.php file for our custom WordPress plugin, with the “Hello World” stuff replaced with real code. Look out… it’s a bit of a lump.
<?php

/**
 * FILE: functions.php
 */

// Block direct access.
if (!defined('WPINC')) {
	exit('Do NOT access this file directly.');
}

/**
 * Return the HTML for our posts grid, using the Bootstrap 4 Grid system.
 *
 * Best results are achieved with 1, 2, 3, 4 or 6 columns.
 *
 * [[ $params ]]
 *    'post_type'   => (string) Post Type slug to use. Default is 'post'.
 *    'cols'        => (int) The number of coumns to redner. Default is 3.
 *    'post_count'  => (int) Ignore the WordPress default number of posts to
 *                     fetch, and try to fetch this many posts instead.
 *    'category'    => (string) comma-separated list of category slugs for the
 *                     posts you want to show.
 *
 * [[ Returns ]]
 * HTML that you can either echo to the output, or do some extra processing if
 * you want.
 */
function spg_get_posts_html($params) {
	$html = '';

	// How many columns do we want?
	$column_count = 0;
	if (array_key_exists('cols', $params)) {
		$column_count = intval($params['cols']);
	}
	if (($column_count < SPG_MIN_COLUMN_COUNT) || ($column_count > SPG_MAX_COLUMN_COUNT)) {
		$column_count = SPG_DEFAULT_COLUMN_COUNT;
	}

	$column_span = intval(floor(SPG_MAX_COLUMN_COUNT / $column_count));
	if ($column_span < 1) {
		$column_span = 1;
	}

	$query_args = array();

	// Have we specified a Post Type?
	$post_type = null;
	if (array_key_exists('post_type', $params)) {
		$post_type = (string) $params['post_type'];
	}

	if (empty($post_type) || !is_string($post_type)) {
		$post_type = 'post';
	}

	$query_args['post_type'] = $post_type;

	// Are we override the default WordPress number of posts per page?
	$posts_per_page = 0;
	if (array_key_exists('post_count', $params)) {
		$posts_per_page = intval($params['post_count']);
	}

	if (!empty($posts_per_page)) {
		$query_args['posts_per_page'] = $posts_per_page;
	}

	// Do we have one or more category slugs in the 'category' paremeter?
	// If so, convert them into IDs so we can set the 'cat' query parameter.
	$category_ids = '';
	if (array_key_exists('category', $params) && is_string($params['category'])) {
		$category_slugs = explode(',', (string) $params['category']);

		foreach ($category_slugs as $category_slug) {
			if (!empty($category_slug) && (($category = get_category_by_slug($category_slug)) !== false)) {
				if (strlen($category_ids) > 0) {
					$category_ids .= ', ';
				}

				$category_ids .= $category->term_id;
			}
		}
	}

	if (!empty($category_ids)) {
		$query_args['cat'] = $category_ids;
	} else {
		// Don't apply a category filter.
	}

	$query_args = apply_filters(
		'spg_post_grid_query_args',
		$query_args
	);

	// TODO: Check that $query_args is a valid array for WP_Query.

	$query = new WP_Query($query_args);
	if ($query->have_posts()) {
		$template_file_name = null;

		$is_row_open = false;
		$column_index = 0;

		$container_classes = null;
		$container_classes_array = apply_filters(
			'spg_container_classes',
			array(SPG_DEFAULT_CONTAINER_CLASS)
		);
		if (!empty($container_classes_array) && is_array($container_classes_array)) {
			$container_classes = trim(implode(' ', $container_classes_array));
		}

		$row_classes = null;
		$row_classes_array = apply_filters(
			'spg_row_classes',
			array(SPG_DEFAULT_ROW_CLASS)
		);
		if (!empty($row_classes_array) && is_array($row_classes_array)) {
			$row_classes = trim(implode(' ', $row_classes_array));
		}

		// Sanitise the returned values from our filters.
		if (empty($container_classes)) {
			$container_classes = SPG_DEFAULT_CONTAINER_CLASS;
		}
		if (empty($container_classes)) {
			$row_classes = SPG_DEFAULT_ROW_CLASS;
		}

		$column_classes = SPG_DEFAULT_COL_CLASS_PREFIX . $column_span;

		$html .= sprintf('<div class="%s">', $container_classes);

		//
		// Our WordPress WP_Query loop.
		//
		while ($query->have_posts()) {
			$query->the_post();

			$post_type = get_post_type();

			// If SPG_IS_DIAGNOSTIC_ENABLED is true (in constants.php) then
			// echo the name of the template file name we're looking for.
			// A useful debugging tool.
			if ((bool) SPG_IS_DIAGNOSTIC_ENABLED && empty($template_file_name)) {
				$template_file_name = SPG_GRID_ITEM_TEMPLATE_PARTS_DIR .
					DIRECTORY_SEPARATOR .
					SPG_GRID_ITEM_TEMPLATE_PART_PREFIX .
					'-' .
					$post_type .
					'.php';
			}

			if (!$is_row_open) {
				$html .= sprintf('<div class="%s">', $row_classes);
				$is_row_open = true;
			}

			$html .= sprintf('<div class="%s">', $column_classes);

			// Start capturing the output buffer.
			ob_start();
			$is_template_found = get_template_part(
				SPG_GRID_ITEM_TEMPLATE_PARTS_DIR .
				DIRECTORY_SEPARATOR .
				SPG_GRID_ITEM_TEMPLATE_PART_PREFIX,
				$post_type
			);
			$html .= ob_get_clean();
			// Output buffer captured - back to normal.

			// If no template was found, make sure we output something.
			if ($is_template_found === false) {
				$html .= get_the_title();
			}
			$html .= '</div>'; // .col-sm-X

			++$column_index;
			if ($column_index >= $column_count) {
				$html .= '</div>'; // .row
				$is_row_open = false;
				$column_index = 0;
			}
		}

		if (!$is_row_open) {
			$html .= '</div>'; // .row
			$is_row_open = false;
		}

		$html .= '</div>'; // .container

		if (SPG_IS_DIAGNOSTIC_ENABLED) {
			$html .= '<p>';
			$html .= 'Template: <em>' . $template_file_name . '</em>';
			$html .= '</p>';
		}

		wp_reset_postdata();
	} else {
		$html .= sprintf(
			'<p>%s</p>',
			__('No posts found', 'simple-post-grid')
		);
	}

	return $html;
}
Like most shortcode functions, the logic flow works like this:
- Parse the $params array to see if we’ve been passed any parameters we can use.
- Sanity-check the parameters before using them.
- Create an args array for our WP_Query.
- Start The Loop.
- Process all the posts from our WP_Query.
- …
- Tidy up.
- Return the HTML in a string.
We’ve now got enough code to test out shortcode. In my test-rig site, I’ve created 3 Posts in a category called “Book Reviews”. This means my shortcode looks like this:
[spg_posts cols="3" post_count="12" category="book-reviews"]
…and here’s how it looks in the browser.
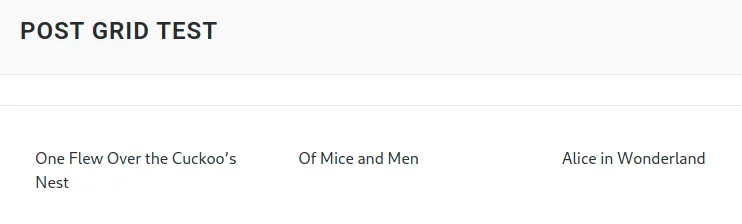
We’re making progress here and we can output some book reviews, but it’s not pretty… so…
Add Some Style
If you have a flick through our spg_get_posts_html() function, you’ll see we make a call to the WordPress function get_template_part(). This means we can add some styling in whatever theme we’re using. If we can’t find a template part then we fall-back to just outputting the post’s title.
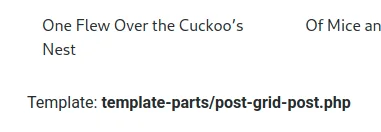
In your custom child theme, make sure you’ve got a folder called “template-parts“. In here, create a new file called “post-grid-post.php“. “The “-post” bit at the end of the file name is because my Book Review posts are of the ‘Post’ post type. If you want to output a grid of Pages then you’ll need a template file called ‘post-grid-page.php’. There’s a neat diagnostic trick here… If you go into constants.php and set SPG_IS_DIAGNOSTIC_ENABLED to true, our shortcode will output the template-part file name it’s looking for 😎
Here’s the template-parts/post-grid-post.php from my custom child theme. It’s just a quick-and-dirty example to show that you can put all sorts in your template-part – PHP logic, straight HTML, whatever you want.
<?php

// Block direct access.
if (!defined('WPINC')) {
	exit('Do NOT access this file directly.');
}

$title = get_the_title();

echo '<div class="post-grid-tile mb-3">';

printf('<a href="%s" title="%s">', esc_url(get_the_permalink()), esc_attr($title));
if (has_post_thumbnail() && !empty($thumbnail = get_the_post_thumbnail_url(null, 'medium'))) {
	printf('<img alt="%s" src="%s" />', esc_attr($title), esc_url($thumbnail));
}
echo '<h2 class="w-100">';
echo esc_html($title);
echo '</h2>';
echo '</a>';

echo '</div>'; // .post-grid-tile
And here’s a bit of styling to make it look presentable. You can put this in the style.css file in your custom child theme. The plugin will work fine without this bit of CSS, but it’ll look unfinished on the screen.
/**
 * Simple Post Grid
 */

.post-grid-tile {
	border: 1px dotted grey;
	position: relative;
	border-radius: 0.5em;
	overflow: hidden;
	box-shadow: 0 0 0.5em lightgrey;
}

.post-grid-tile:hover {
	box-shadow: 0 0 0.5em grey;
}

.post-grid-tile img {
	width: 100%;
	object-fit: cover;
}

@media (min-width: 576px) {
	.post-grid-tile img {
		height: 10em;
	}
}

.post-grid-tile h2 {
	position: absolute;
	bottom: 0;
	font-size: 11pt;
	background: rgba( 255, 255, 255, 0.75 );
	transition: 0.3s;
	margin: 0;
	height: 3.5em;
	text-align: center;
	color: black;
	padding-top: 0.5em;
	border-top: 1px dotted grey;
}

.post-grid-tile a:hover h2 {
	background: rgba( 255, 255, 255, 1.00 );
}
And here’s the finished result, fleshed-out with a few more book reviews to prove that our grid can span multiple rows properly.

Wrapping Up
I’ll cover more advanced custom plugins in another post, with things like jQuery & JavaScript, Cron jobs and other goodies. But this should be enough to give you some ideas for your own plugin… or maybe even do something fun with this one. You could easily set the post_type to ‘product’ and start displaying WooCommerce shop content in a grid format in your posts. Or maybe you want to want to add a Gutenburg Block to complement the shortcode?
If you need to create some shortcodes, add some common functionality, and reuse code across multiple WordPress sites, then knowing how to create a custom plugin is a great tool for any developer!


This is just what I’ve been looking for! Thank you!
Glad you found it useful!