Learn how to create a custom user registration form in WordPress. Capture custom user data and show them in the back-end admin user table. Use it with WooCommerce, or hook into any other frontend user registration form.
The custom form fields will be defined in a PHP/HTML snippet file so you can lay out the controls any way you want. We’ll also handle the form inputs securely – we don’t want to introduce any security holes into our website.
The great thing about doing this yourself, instead of using a plugin, is that you’ve got 100% control of the layout. You can make it look exactly how you want.
importantBefore starting this tutorial, make sure you’re using a custom child theme so you can edit functions.php.
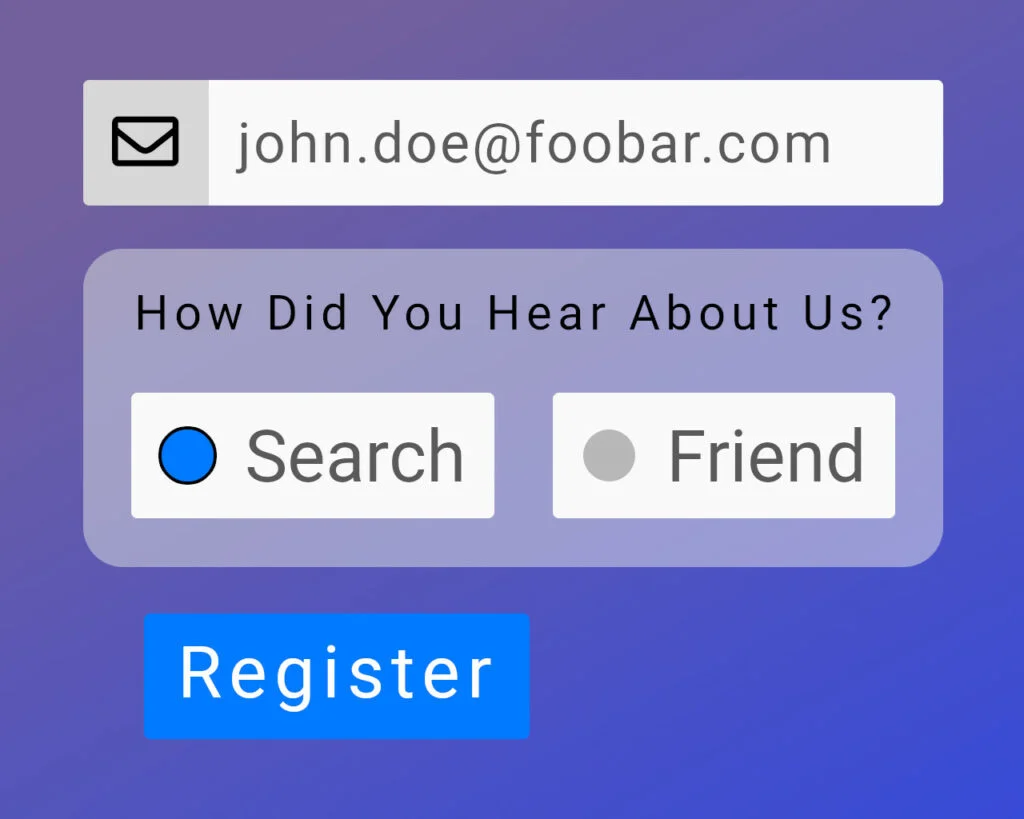
Example Registraion Form
A password will be sent to your email address.
How Did You Hear About Us?
a custom user field
Break Down the Problem Into Chunks
Before we can write any code, we need to understand what we’ve got to work with. We need to figure out how we can…
- inject our HTML controls into the front-end.
- process the submitted (POST) form data and save it against the new user’s account.
Render the Form Fields in the Front-End
We’re going to assume that you’ve got WooCommerce installed on your site. Make sure you’ve enabled the option to allow users to register on the login (My Account) page:
By looking through the template PHP file that comes with WooComemrce (plugins/woocommerce/templates/myaccount/form-login.php) we can see that it triggers an action called “woocommerce_register_form” just where it would be great to inject our custom HTML.
So… this is all we need to do to get our controls onto the page:
- Add an action handler for
woocommerce_register_formthat points to a custom function – custom_user_registration_form(). - In
custom_user_registration_form()- render a WordPress nonce field, which we’ll use to verify the source of the form data.
- include our PHP file. This will contain the HTML to layout the custom controls.
The HTML that goes into the form snippet can be whatever you want. Maybe you want to use Bootstrap to lay out your form, or just vanilla HTML. It’s your choice.


Process the POSTed Form Data in the Back-End
There are lots of ways we can process incoming form data in PHP. In this case, we’re going to wait for WordPress to raise an action that lets us know a new user has been created. When we react to this action, we’ll check the POST variables for our form field values, check that they’re not full of hacky JavaScript SQL-injection rubbish, and then save the field values against the new user as user_meta.
We’re going to hook the user_register action, which is fired straight after a new user has been registered. By hooking this, we know that WordPress has already made sure the user’s email address is not jibberish, and we’ve got a new and valid user_id that we can use.
Our custom function will work like this
- Check to see if our nonce is present and is valid. If it is, then…
- For each of our custom fields…
- Sanitise the field value.
- If the field value is not empty, save it using update_user_meta().
- For each of our custom fields…

The Front-End Code
Let’s write some code.
In your custom child theme’s main folder, create a new file called custom-forms.php and a folder called custom-forms. Go into the custom-forms folder and create a file called user-registration-form-1.php. The files in your custom child theme should look like this:
- functions.php
- …
- style.css
- …
- custom-forms
- user-registration-form-1.php
- custom-forms.php
Copy and paste the following into custom-forms.php
<?php

/**
 * Headwall WP Tutorials : Custom Forms
 *
 * https://wp-tutorials.tech/add-functionality/custom-user-registration-form-fields/
 */

// Abort if we've not been called as part of WordPress.
defined('WPINC') || die();

/**
 * Inject our custom user registration form fields into the front-end HTML.
 */
function custom_user_registration_form() {
	// Get our current directory.
	$dir_name = trailingslashit(dirname(__FILE__));

	// The full path to the form file we want to include.
	$form_file_name = $dir_name . 'custom-forms/user-registration-form-1.php';

	// If the file doesn't exist, or if it exists but is not readable for some
	// reason, don't try to include it.
	if (!is_readable($form_file_name)) {
		echo '<p><strong>ERROR</strong>: Form PHP file not found or not readable.</p>';
	} else {
		// Render the "nonce" field, which we'll validate later.
		wp_nonce_field('custom_user_reg', 'custom_user_reg_wpnonce', false);

		// Important: Never cache pages that contain a nonce.
		if (!defined('DONOTCACHEPAGE')) {
			define(DONOTCACHEPAGE, true);
		}

		include $form_file_name;
	}
}
add_action('woocommerce_register_form', 'custom_user_registration_form');
Now open your child theme’s main functions.php file and add the following to it.
// Custom User Registration Form Fields.
require_once dirname(__FILE__) . '/custom-forms.php';
Finally, we need to create the actual HTML controls in user-registration-form-1.php. Here’s something to get you started.
<?php

// Block direct access.
defined('WPINC') || die();

?><div class="custom-user-reg-fields">
	<input type="radio" name="how-hear" id="howhear1" value="search" checked>
	<label for="howhear1">Search</label>

	<input type="radio" name="how-hear" id="howhear2" value="recommendation">
	<label for="howhear2">Recommendation</label>

	<input type="radio" name="how-hear" id="howhear3" value="other">
	<label for="howhear3">Other</label>
</div>
We don’t need the outer <form> tags because the file is being included from within the WooCommerce form, which does all that for us.
Notice that the custom user field is called “how-hear” in the HTML form, so we’ll need to check for $_POST['how-hear'] in the back-end code.
Open a new Incognito browser window and go to your website’s My Account / Login page and you should see your custom fields in there 👍
The Back-End Code
Read and Save the POST Form Data
It’s time to hook user_register and do the fiddly back-end bits. We can actually do this in a single function. Open custom-forms.php and paste the following at the end of the file.
/**
 * Pick up when a new user has been registered, and see if our custom fields
 * need to be processed.
 */
function custom_form_user_register($user_id, $userdata) {
	if (!array_key_exists('custom_user_reg_wpnonce', $_POST)) {
		// Our custom nonce field called "custom_user_reg_wpnonce" is no in the
		// POST data, so don't do anything.
	} elseif (!wp_verify_nonce($_POST['custom_user_reg_wpnonce'], 'custom_user_reg')) {
		error_log('Blocked use of invalid nonce.');
	} else {
		// Check that how-hear has come through in the POST data. If it has,
		// then sanitize it to remove any hacker rubbish.
		if (array_key_exists('how-hear', $_POST) && !empty($how_hear = sanitize_text_field($_POST['how-hear']))) {
			update_user_meta($user_id, 'how_hear', $how_hear);
		}

		// Check other custom user fields...
		// if (array_key_exists('some-other-field', $_POST) && !empty($another_field = sanitize_text_field($_POST['some-other-field']))) {
		//     update_user_meta($user_id, 'some_key_a', $another_field);
		// }
	}
}
add_action('user_register', 'custom_form_user_register', 10, 2);
The logic should be easy to follow. This function gets called when the user_register action is raised by WordPress. The first thing we do is check that there is a field called “custom_user_reg_wpnonce” in the POST form data. If so, then use wp_verify_nonce() to verify its content. If we’re happy that the nonce is present and is valid, we check for each of our custom fields, sanitise their values (very important) and store them using update_user_meta().
Adding Custom User Admin Columns
The final thing we need to do is show our custom user data in the admin users table. For this, we need hook two filters…
- manage_users_columns : Modify the list of columns in the admin users table (on the screen).
- manage_users_custom_column : Show the individual values of our custom fields for each user.
Past the following into custom-forms.php…
/**
 * Add one or more custom columns to the admin users page.
 */
function custom_forms_manage_users_columns($columns) {
	// $columns is a simple associative array of strings, where the array keys
	// are the internal name of the column, and the array values are what's
	// shown in the column headers.
	$columns['how_hear'] = 'Source';

	// Add more columns here if you want...
	// $columns['some_key_a'] = 'My Column A';
	// $columns['some_key_b'] = 'My Column B';

	return $columns;
}
add_filter('manage_users_columns', 'custom_forms_manage_users_columns');

/**
 * Display the row data in the custom user columns. This gets called for each
 * custom column, for each user... so don't put lots of code in here or it'll
 * slow down the back-end of your site.
 */
function custom_manage_users_custom_column($output, $column_name, $user_id) {
	switch ($column_name) {
	case 'how_hear':
		// The "true" parameter is important, because it says we want a single
		// value for "how_hear"... not an array of values.
		$output = get_user_meta($user_id, 'how_hear', true);
		break;

	case 'some_key_a':
		// $output = get_user_meta($user_id, 'some_key_a', true);
		break;

	default:
		// Unknown custom column. Don't do anything.
		break;
	}

	return $output;
}
add_filter('manage_users_custom_column', 'custom_manage_users_custom_column', 10, 3);
Wrap Up and Test
That’s all there is to it. It’s a problem of two chunks…
- Front-end: Output some HTML with your form fields in it, and a WordPress nonce field.
- Back-end: Hook an action (in this case, user_register), look for our nonce field, validate the nonce field, then read and store the sanitised contents of our custom fields.
This technique can be adjusted to inject custom forms into other content too, such as the WooCommerce checkout – the logic flow is the same. Just make sure to always use a WordPress nonce to validate that the POST data have come from your site, and not from a hacker… and always sanitise the contents of your form fields to prevent SQL Injection attacks.
When you need to capture some custom fields… don’t go for a bloated plugin… just use a few simple functions and a splash of HTML 😎 👍

