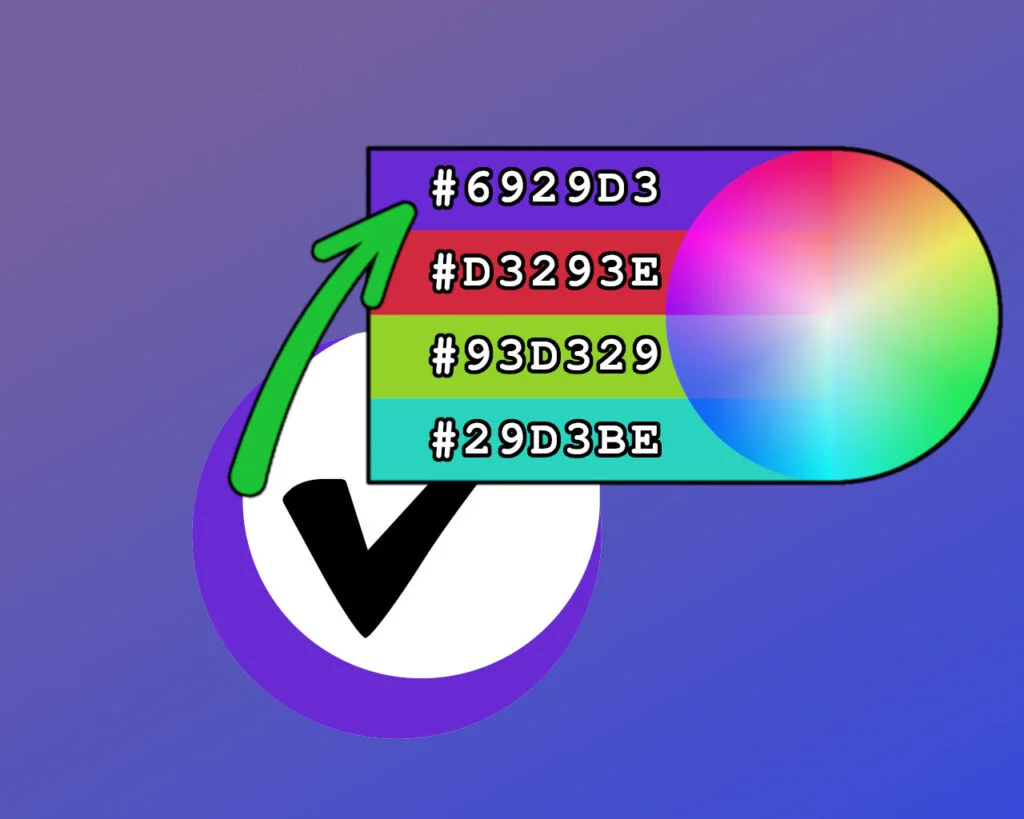
In this WordPress tutorial we’ll cover how to analyse an image, automatically extract the dominant colour, then create a complementary colour scheme. We’ll cover how to create the core image-analyser function, and a frontend scheme swatch… so you can see it working and play with the parameters.
To create the scheme, we’ll use standard PHP/ImageMagick functions to extract the most common colour from the image… the most common colour that’s not black, white or grey. We’ll grab this colour in HSL format, take the Hue (which is just an angle from 0 – 360°) and create complementary colours that are equally spaced around the colour wheel.
importantBefore starting this tutorial, make sure you’re using a custom child theme so you can edit functions.php.
Error: Failed to generate scheme from: https://wp-tutorials.tech/wp-content/uploads/2022/11/cropped-headwall-wordpress-tutorials-icon.png
What We’re Going to Make
Like with most code projects, we need to create a core function that “does the cool stuff”, and add some supporting code to help it fit into the real world. The core function will take two input parameters:
- Image URL: This is the image we’ll examine, to extract our primary/dominant colour.
- Number of Colours: How many colours we want in our scheme. There will be at least one colour (the primary colour) and 2, 3 or 4+ complementary colours.
We’ll also create a shortcode so we can get good visual feedback that the core code is working properly. Here it is in action.
Error: Failed to generate scheme from: https://wp-tutorials.tech/wp-content/uploads/2021/11/active-hands-logo-landscape-1.png
Error: Failed to generate scheme from: https://wp-tutorials.tech/wp-content/uploads/2021/11/active-hands-gripping-aid-1.jpg
Images courtesy of Active Hands Gripping Aids. Thanks, guys 👍
Core Function Logic
The image processing is fairly straightforward. The PHP ImageMagick library does most of the work for us. All we need to do is extract the primary colour, convert it from RGB to HSL format, then create some extra colours based on the saturation & luminosity of the primary colour. The Hue is just an angle on the colour wheel, from 0 to 360°. If we’re generating a colour scheme with 4 colours (including the primary colour), then we need four colours with the same Saturation and Luminosity that are 90° apart. If you we want a three colour scheme, then the hues are 120° apart.
- Load the image into ImageMagick.
- Resize the image to a small thumbnail to make it faster to analyse.
- Extract the pixel histogram. This is an array of pixel data, where each element in the array represents a colour, and a count of how many times it is used in the image.
- Set
$highest_pixelto null. - For each pixel in the histogram…
- If the colour is not white, black or grey, then…
- If this pixel colour’s appears in the image more than any other we’ve tested, save it in to
$highest_pixel.
- If this pixel colour’s appears in the image more than any other we’ve tested, save it in to
- If the colour is not white, black or grey, then…
- Set
$colour_schemeto an empty array. This will hold our colour scheme colours. - If
$highest_pixelis not null, then…- Get the Hue, Saturation and Lightness of
$highest_pixel. - Add the primary colour to $theme.
- Set
$delta_hue = 360.0 / $number_of_colours_in_theme. - Add each complementary colour to
$theme.
- Get the Hue, Saturation and Lightness of
Scaffold the Code
In your custom child theme’s folder, create a file called “wpt-auto-admin-theme.php” and paste the following into it:
<?php

/**
 * WP Tutorials : Auto Admin Theme (WPT_AAT)
 *
 * https://wp-tutorials.tech/refine-wordpress/auto-create-a-colour-scheme-from-an-image/
 */

defined('WPINC') || die();

/**
 * General parameters for the auto-admin theme creator.
 */
const WPT_AAT_MIN_COLOURS = 2;
const WPT_AAT_MAX_COLOURS = 32;

/**
 * Load a file name or URL that can be opened with file_get_contents().
 * Extract the dominant non-white, non-black, non-grey colour.
 * Add the primary colour to the $colour_theme array,
 * Add complementary colours to the $colour_theme array,
 */
function wpt_aat_create_scheme(string $url, int $colour_count) {
    $colour_scheme = array();

    if (empty($url)) {
        error_log('No URL specified.');
    } elseif ($colour_count < WPT_AAT_MIN_COLOURS) {
        error_log('Invalid colour_count. Too low.');
    } elseif ($colour_count > WPT_AAT_MAX_COLOURS) {
        error_log('Invalid colour_count. Too high.');
    } elseif (!class_exists('Imagick')) {
        error_log('PHP ImageMagick extension not found.');
    } elseif (empty($image_blob = file_get_contents($url))) {
        error_log('Failed to load image: ' . $url);
    } else {
        // Analyse the image and create an array of colours...
        // ...
        // ...
    }

    return $colour_scheme;
}

/**
 * Diagnostic shortcode that takes and image and a colour-count,
 * then outputs HTML to show the colour-scheme.
 */
function wpt_aat_colour_scheme_shortcode($atts) {
    $html = '';

    if (is_admin()) {
        // ...
    } elseif (wp_doing_ajax()) {
        // ...
    } else {
        $args = shortcode_atts(
            array(
                'colours' => WPT_AAT_COLOURS_IN_ADMIN_SCHEME,
                'image' => get_site_icon_url(),
                'caption' => 'Auto-Generated from favicon.ico',
            ),
            $atts
        );

        // Create a colour scheme based on the image URL and output it
        // as a "figure" so we can verify that the main colour scheme
        // generator function is working correctly.
        // ...
        // ...
    }

    return $html;
}
add_shortcode('colour_scheme_preview', 'wpt_aat_colour_scheme_shortcode');
That’s our scaffold in-place, so let’s reference it from our child theme. Open your child theme’s functions.php file and add the following to it…
// WP Tutorials : Auto Admin Theme (WPT_AAT)
require_once dirname(__FILE__) . '/wpt-auto-admin-theme.php';
Now we just need to populate the functions themselves.
The Image Analyser
The first thing we need to do is create the core image-analyser function. Open wpt-auto-admin-theme.php and populate the placeholder wpt_aat_create_scheme() function with the following code.
function wpt_aat_create_scheme(string $url, int $colour_count) {
    $colour_scheme = array();

    if (empty($url)) {
        error_log('No URL specified.');
    } elseif ($colour_count < WPT_AAT_MIN_COLOURS) {
        error_log('Invalid colour_count. Too low.');
    } elseif ($colour_count > WPT_AAT_MAX_COLOURS) {
        error_log('Invalid colour_count. Too high.');
    } elseif (!class_exists('Imagick')) {
        error_log('PHP ImageMagick extension not found.');
    } elseif (empty($image_blob = file_get_contents($url))) {
        error_log('Failed to load image: ' . $url);
    } else {
        // Create the image object.
        $image = new Imagick();
        $image->readImageBlob($image_blob);

        // Resize the image so it's quicker to analyse.
        $image->adaptiveResizeImage(160, 160, true);

        // Get the histogram.
        $pixels = $image->getImageHistogram();

        $highest_count = 0;
        $highest_pixel = null;

        $luminosity_threshold = 0.50;

        // Look for a dominant colour within a band of luminosity.
        // Keep widening the band until it works, or the threshold goes too low.
        while (empty($highest_pixel) && ($luminosity_threshold >= 0.20)) {
            foreach ($pixels as $pixel) {
                $pixel_count = $pixel->getColorCount();
                if ($pixel_count > $highest_count) {
                    $primary_colours = $pixel->getColor();
                    $hsl = $pixel->getHSL();

                    if ($hsl['saturation'] < 0.40) {
                        // Too washed-out or grey.
                    } elseif ($hsl['luminosity'] < $luminosity_threshold) {
                        // Too dark.
                    } elseif ($hsl['luminosity'] > 0.65) {
                        // Too white.
                    } else {
                        $highest_count = $pixel_count;
                        $highest_pixel = $pixel;
                    }
                }
            }

            if (empty($highest_pixel)) {
                $luminosity_threshold -= 0.05;
            }
        }

        if (!empty($highest_pixel)) {
            $base_hsl = $highest_pixel->getHSL();

            $text_colour = '#000000';
            if ($base_hsl['luminosity'] < 0.50) {
                $text_colour = '#ffffff';
            }

            $colour_index = 0;
            while ($colour_index < $colour_count) {
                // $base_hsl['hue'] is a value of 0.0 to 1.0, where 1.0
                // represents an actual hue of 360 degrees.
                $hue = 1.0 * $base_hsl['hue'] + ($colour_index / $colour_count);

                // Keep the hue between 0.0 and 1.0.
                while ($hue > 1.0) {
                    $hue -= 1.0;
                }

                // Scale hue so it is from 0.0 to 360.0
                // Scale saturation and luminosity from 0.0 to 100.0 percent
                $constructor = sprintf(
                    'hsl( %.2f, %.2f%%, %.2f%% )',
                    $hue * 360.00,
                    $base_hsl['saturation'] * 100.0,
                    $base_hsl['luminosity'] * 100.0
                );

                // Create a pixel to hold the new colour.
                $pixel = new ImagickPixel($constructor);

                // Get the colour in r/g/b format.
                $primary_colours = $pixel->getColor();

                // Add our new colour to the output array, with an "html" value,
                // some "debug" information and the colour to use for
                // "text" overlays.
                $colour_scheme[] = array(
                    'html' => sprintf(
                        '#%02X%02X%02X',
                        $primary_colours['r'],
                        $primary_colours['g'],
                        $primary_colours['b']
                    ),
                    'debug' => $constructor,
                    'text' => $text_colour,
                );

                ++$colour_index;
            }
        }

        $image->destroy();
    }

    return $colour_scheme;
}
Like most functions that take one or more input parameters and creates an output, we use this structure:
- Initialise our output value.
- Check that the input parameters are valid.
- If an input parameter is not valid, then…
- Generate a log message stating which input is invalid, and why.
- Else…
- Do the work.
- Store the result in the output value.
- Return the output value.
The “Do the work” section of this function has two stages to it…
- Get the image’s colour histogram and try to find a dominant colour.
- If there is a dominant colour, then get it’s hue and calculate the rest of the colour scheme by moving the hue around the colour wheel.
Diagnostics in the Frontend
Now we need the shortcode, so we can actually see it working in the frontend. In wpt-auto-admin-theme.php, replace the contents wpt_aat_colour_scheme_shortcode() with the following:
function wpt_aat_colour_scheme_shortcode($atts) {
    $html = '';

    if (is_admin()) {
        // ...
    } elseif (wp_doing_ajax()) {
        // ...
    } else {
        $args = shortcode_atts(
            array(
                'colours' => WPT_AAT_COLOURS_IN_ADMIN_SCHEME,
                'image' => get_site_icon_url(),
                'caption' => 'Auto-Generated from favicon.ico',
            ),
            $atts
        );

        // If the frontend CSS hasn't been enqueued yet, enqueue it now.
        global $have_wpt_aat_public_assets_been_enqueued;
        if (is_null($have_wpt_aat_public_assets_been_enqueued)) {
            $base_url = get_stylesheet_directory_uri() . '/wpt-auto-admin-theme';
            $version = wp_get_theme()->get('Version');

            wp_enqueue_style(
                'wpt-aat-diagnostics',
                $base_url . '/diagnostics.css',
                null,
                $version
            );

            $have_wpt_aat_public_assets_been_enqueued = true;
        }

        if (empty($colour_scheme = wpt_aat_create_scheme($args['image'], $args['colours']))) {
            $html .= sprintf(
                '<p><strong>Error: </strong>Failed to generate scheme from: %s</p>',
                esc_html($args['image'])
            );
        } else {
            $html .= '<figure class="wpt-aat-diagnostics aligncenter size-full">';

            $html .= '<div>';

            $html .= sprintf(
                '<img src="%s" alt="%s" class="theme-image" />',
                esc_url($args['image']),
                esc_attr(sprintf('Automatic colour scheme with %d colours', $args['colours']))
            );

            $html .= '<div class="palette">';
            $colour_index = 0;
            foreach ($colour_scheme as $colour_meta) {
                $label = $colour_meta['html'];

                $styles = array(
                    'background-color:' . $colour_meta['html'],
                    'color:' . $colour_meta['text'],
                );

                $classes = array('swatch');

                if ($colour_index == 0) {
                    $classes[] = 'primary-colour';
                }

                $html .= sprintf(
                    '<div class="%s" style="%s"><label>%s</label></div>',
                    esc_attr(implode(' ', $classes)),
                    esc_attr(implode(';', $styles)),
                    $label
                );

                ++$colour_index;
            }
            $html .= '</div>'; // .palette

            $html .= '</div>'; // No class

            if (!empty($args['caption'])) {
                $html .= sprintf(
                    '<figcaption>%s</figcaption>',
                    esc_html($args['caption'])
                );
            }

            $html .= '</figure>'; // .wpt-aat-diagnostics
        }
    }

    return $html;
}
add_shortcode('colour_scheme_preview', 'wpt_aat_colour_scheme_shortcode');
And you’ll want some CSS with that. In your custom child theme’s folder, create a new folder called “wpt-auto-admin-theme”, create a file in there called diagnostics.css and paste the following into it:
/**
 * WP Tutorials : Auto Admin Theme (WPT_AAT)
 *
 * Styles for the diagnostics shortcode.
 */

.wpt-aat-diagnostics>div {
    border: 1px solid #44444444;
    border-radius: 1em;
    background-color: #ffffff88;
    overflow: hidden;
    display: flex;
    flex-direction: row;
    margin-bottom: 1em;
    box-shadow: 0 0 1em #44444444;
    justify-content: space-between;
}

.wpt-aat-diagnostics .theme-image {
    object-fit: contain;
    width: 60%;
    padding: 1em
}

.wpt-aat-diagnostics .palette {
    width: 40%;
    display: flex;
    flex-direction: column;
}

.wpt-aat-diagnostics .swatch {
    flex: 1;
    text-align: center;
    font-family: monospace;
    display: flex;
    justify-content: center;
    align-items: center;
    position: relative;
}

.wpt-aat-diagnostics .primary-colour::before {
    position: absolute;
    right: 0.5em;
    top: 50%;
    transform: translateY(-50%);
    content: '⭐';
    text-shadow: 0 0 2px black;
}

.wpt-aat-diagnostics label {
    margin: 0;
    padding: 0.5em;
}

.wpt-aat-diagnostics .primary-colour label {
    font-weight: bold;
}
You can now use the colour_scheme_preview shortcode on your site. Edit some content, add a shortcode block “colour_scheme_preview” and view it in the frontend.
importantIf your site doesn’t have a favicon, you’ll need to pass an image URL in the “image” parameter.
| Param | Notes |
|---|---|
| colours int | The number of colours you want in the colour scheme. |
| image string | URL of the image you want to analyse. Default value is the site’s favicon, using get_site_icon_url(). |
| caption string | An optional caption for the colour scheme preview. |

Error: Failed to generate scheme from: https://wp-tutorials.tech/wp-content/uploads/2022/11/cropped-headwall-wordpress-tutorials-icon.png
Have a play with the shortcode to make sure the core function is working as you expect:
- Does it actually work?
- Is PHP ImageMagick available?
- Try different image URLs and check you’re happy with:
- Transparency
- Low-contrast images
- Large images; maybe try something from Unsplash
- Different colour counts
- What happens when you specify a negative colour count?
- or if you set an invalid colour count, such as colours=”abc”?
Wrapping Up
What we’ve created here is a proof-of-concept – not very useful, but kind-of interesting.
In the next tutorial we’ll build on this code to create an automatic admin colour scheme creator. This will take a site’s faviocn and create a CSS file to drive a WordPress admin colour scheme. That’s a really handy thing to have when you need to log in to lots of different WordPress sites all the time. If the back-end of each site looks different, and is themed on the site’s favicon, it acts as a great visual aid.
…but that’s for next time. Until then…
Happy colour-scheming 😎👍

