
In this WordPress tutorial, we’re going to create a glossary with rich HTML tooltips controlled by Popper JS. This is a chunky tutorial compared to our others, but it’s still in a copy-and-paste arrangement. We recommend you follow the tutorial fully… There are multiple source files here and if you make a mistake somewhere, it’ll be difficult to find the fault if you’ve not followed the logic.
importantWe’re going to use the expression “glossary terms” a lot in this tutorial, but these are not WordPress “terms”. We’re going to create a custom post type called “glossary-term” so our glossary terms will actually be WordPress Post objects. In fact, this tutorial has absolutely nothing to do with WordPress Terms or Taxonomies.
Getting Started
Define the Project
We want to create a custom post type, where each post item will have a glossary term (stored as the post title) and a description (its content). When a visitor is reading an article, the first instance of any glossary term should be underlined differently to regular hyperlinks. When the user hovers/clicks on one of these glossary terms, they should see a rich HTML tooltip with that term’s description in it.
Glossary terms that are nested within HTML elements (e.g. strong, em or a) should not be processed, as we don’t want to affect the SEO value of those links.
The project needs to be responsive. Users should be able to click on, or hover over, a glossary term to view it. When they move the pointer away from the term, or click somewhere in the document’s background, the tooltip should disappear.
The system needs to work well with page caching plugins and different types of page builder, like Gutenberg (the default WordPress page editor), Elementor and Divi.
Define the Solution
Most of the tutorials on here are implemented as modules in a custom child theme, but this one is different. We’re defining a custom post type that affects the actual content of the site, rather than just its presentation. So… we’re going to build our own WordPress plugin.
Because we need to work with page caching and different page builders, we’re going to implement most of the logic in the browser… that’s where we’re going to scan the page for glossary terms. As we’re doing it this way around, we need to pass all the glossary terms to the browser on every page load (in a global JavaScript variable). This kinda feels like a bad/lazy idea at first. But, even if you’ve got 200 glossary terms, that’s equivalent to only two or three paragraphs of text. It’s not going to affect the size of the DOM as much as you might think.
So, the logic breaks down like this:
In the back-end
We’ve got a custom post type with our glossary terms as post items. Each glossary term “post” has three key properties:
- Title – this is the glossary term itself, like “My Glossary Term”
- Name – The slug for our term is automatically created by WordPress, based on the sanitised title , e.g. “my-glossary-term”
- Content – This is the body of the content for the term, which we’ll fetch using get_the_content().
Page-load sequence
- The user requests a URL that’s a page or a single post, e.g. your most recent blog post.
- We enqueue the Popper library, along with our plugin’s CSS and JavaScript assets. We’ll use wp_localize_script() to add the glossary terms to the document’s HTML as a JavaScript array (of strings).
- When the page has loaded in the browser, our custom JavaScript is called…
- Check that we have a list of glossary terms (the glossary terms array)
- Select all DOM elements that need scanning for glossary terms – paragraph elements within article elements (Selector =
article p) - For each of these elements…
- Scan for each glossary term. If it’s found, and we’ve not already processed this term, then…
- Replace the text with
<span class="glossary-term" data-term-slug="${termSlug}">TERM TEXT</span> - Create the tooltip
divelement and attach it to the end of the document body in the DOM (hidden) - Create a Popper instance and configure it to use our
<span>...</span>and tooltip elements - Connect the event handlers that hide and show the tooltip via Popper.
- Make a note that we’ve processed this term, so we don’t process it again.
- Replace the text with
- Scan for each glossary term. If it’s found, and we’ve not already processed this term, then…
- If we’re taking a long time to process all the content & glossary terms, then…
- abort, so we don’t lock the browser for the user.
Showing the tooltips
- When a user tries to show a tooltip…
- If no tooltips have been shown yet, then…
- Create an array of all the glossary term slugs found on this page.
- AJAX POST these to admin-ajax.php, along with the name of our custom action. Our back-end function will return the HTML snippets for each of the glossary terms we’ve asked for.
- For each of these terms…
- Find the tooltip element and set the inner HTML to the returned HTML snippet.
- Show the tooltip for the requested glossary term.
- If no tooltips have been shown yet, then…
Scaffold the Code
Let’s get our hands dirty with some actual coding. Create a folder on your computer somewhere called “wpt-glossary”. This will hold all the files for our plugin. In here, create a file called “wpt-glossary.php” and paste the following into it:
<?php

/**
 * Plugin Name:       WPT Glossary
 * Plugin URI:        https://wp-tutorials.tech/refine-wordpress/create-a-dynamic-glossary-with-javascript-tooltips/
 * Description:       Word glossary for blog posts, with rich HTML tooltips.
 * Version:           1.0.1
 * Author:            Headwall WP Tutorials
 * Author URI:        https://headwall-hosting.com/
 * License:           GPLv3 or later
 * License URI:       https://www.gnu.org/licenses/gpl-3.0.html
 * Text Domain:       wpt-glossary
 * Domain Path:       /languages
 */

defined('WPINC') || die();

const WPTGLS_NAME = 'wpt-glossary';
const WPTGLS_VERSION = '1.0.1';

define('WPTGLS_DIR', plugin_dir_path(__FILE__));
define('WPTGLS_URL', plugin_dir_url(__FILE__));
define('WPTGLS_ASSETS_DIR', trailingslashit(WPTGLS_DIR . 'assets'));
define('WPTGLS_ASSETS_URL', trailingslashit(WPTGLS_URL . 'assets'));

require_once WPTGLS_DIR . 'constants.php';
require_once WPTGLS_DIR . 'functions-private.php';
require_once WPTGLS_DIR . 'includes/class-plugin.php';

function wpt_glossary_plugin_run() {
	global $wpt_glossary_plugin;

	$wpt_glossary_plugin = new WPT_Glossary\Plugin(WPTGLS_NAME, WPTGLS_VERSION);
	$wpt_glossary_plugin->run();
}

/**
 * Main entry point for the WP Glossary plugin.
 */
wpt_glossary_plugin_run();
The comment section at the top is picked up by WordPress and used as the plugin’s meta data. You can change most of it, but the important bit to get right is the version number. The version in the comments should exactly match the version in WPTGLS_VERSION. Oh, and make sure you stick to semantic versioning.
Next up, create the folder structure and empty text files, so you end up with this:
- assets (folder)
- wpt-glossary-public.css (empty text file)
- wpt-glossary-public.js (empty text file)
- includes (folder)
- class-plugin.php (empty text file)
- constants.php (empty text file)
- functions-private.php (empty text file)
- wpt-glossary.php (we’ve already created this file)
Edit includes/class-plugin.php and add the following code to it:
<?php

namespace WPT_Glossary;

defined('WPINC') || die();

class Plugin {
	protected $name;
	protected $version;

	public function __construct($name, $version) {
		$this->name = $name;
		$this->version = $version;
	}

	/**
	 * Main entry point for our plugin.
	 *
	 * A lot of WordPress' initialisation will not have happened yet, so we can't
	 * do much in here. All we can really do is connect action and filter hook.
	 */
	public function run() {
		add_action('init', array($this, 'init'));
		add_action('wp_enqueue_scripts', array($this, 'enqueue_scripts_and_styles'));

		// These are our action handlers that return the glossary term HTML
		// snippets via AJAX calls.
		add_action('wp_ajax_' . ACTION_GET_TERM_HTML_SNIPPETS, array($this, 'get_glossary_term_snippets'));
		add_action('wp_ajax_nopriv_' . ACTION_GET_TERM_HTML_SNIPPETS, array($this, 'get_glossary_term_snippets'));
	}

	public function init() {
		$this->register_glossary_term_post_type();
	}

	public function register_glossary_term_post_type() {
		// ...
	}

	public function enqueue_scripts_and_styles() {
		// ...
	}

	/**
	 * Our AJAX action handler.
	 */
	public function get_glossary_term_snippets() {
		$response_code = 400;
		$response_data = null;

		// ...

		// Send the response back to the browser (as JSON) and exit.
		wp_send_json($response_data, $response_code);
	}
}tipWe’re using a PHP Namespace to keep our code separate from the global scope. If you’re not familiar with PHP Namespaces, have a quick read-up on them. They’re easy to understand, and critical to creating robust code.
Finally (for the scaffolding), add the following code into constants.php:
<?php

namespace WPT_Glossary;

defined('WPINC') || die();

/**
 * If we take too long to scan for terms, abort. We don't want to lock-up the
 * browser on slow devices. This is in milliseconds.
 */
const MAXIMUM_BROWSER_SCANNING_TIME = 2000; // ms

/**
 * Set this to true if you want to preload the glossary term HTML snippets on
 * every page load. If set to false, it will only load the snippets when the
 * user hovers over the first glossary term.
 */
const ALWAYS_LOAD_ALL_TOOLTIPS = false;

/**
 * The name of the post type that holds our glossary terms.
 */
const POST_TYPE_GLOSSARY_TERM = 'glossary-term';

/**
 * External library - Popper JS
 */
const POPPER_VERSION = '2.11.6';

/**
 * Our custom AJAX action for requesting the glossary term HTML snippets.
 */
const ACTION_GET_TERM_HTML_SNIPPETS = 'getglossaryhtml';

/**
 * The element selector used in the front-end to find DOM elements that can
 * contain glossary terms.
 */
const DEFAULT_CONTENT_SELECTOR = 'article p';
Grab the Popper JS library
Head over to popper.js.org and download the latest JS file. It’ll probably give you the URL for their CDN, but you can paste that into your browser, load the file, then save the page to assets/popper.js.
Make a note of the version number at the top of the source. In this example, it’s 2.11.6. If the version number of your Popper source is different (i.e. newer), you need to update “constants.php” so that POPPER_VERSION is set to the correct version.

Deploy the scaffolded plugin
Now we’ve got all files in there (even though some of them are still empty) we can upload the plugin to the site, and activate it. Zip up the “wpt-glossary” folder so you’ve got a file called “wpt-glossary.zip”, then upload it to your site via Plugins > Add New (click on the “Upload Plugin” button). When the zip file has uploaded, activate the plugin and check that everything looks OK.

infoIf you don’t have access to the server’s file system, you can edit the plugin’s files in the WordPress admin area by going to Plugins > Plugin file editor.

The Back-end PHP Code
Now we’ve got a working plugin framework, we can start filling-in the gaps. Let’s start with the core back-end functionality. Open functions-private.php (it should be an empty file) and paste the following into it:
<?php

namespace WPT_Glossary;

defined('WPINC') || die();

/**
 * An array of post types that should be scanned for glossary terms.
 * Use the wpt_glossary_for_post_types filter if you want to override it in your
 * child theme's functions.php.
 */
function get_post_types_that_use_the_glossary() {
	return (array) apply_filters('wpt_glossary_for_post_types', array('post', 'page'));
}

/**
 * Return an array of glossary term metas.
 * @param array $glossary_slugs	Glossary terms slugs that we want to lookup.
 * @param bool $with_content	Whether or not to include the HTML sippets in the metas.
 */
function get_glossary_term_metas(array $glossary_slugs = null, bool $with_content = false) {
	$glossary_term_metas = array();

	$args = array(
		'post_type' => POST_TYPE_GLOSSARY_TERM,
		'post_status' => 'publish',
		'numberposts' => -1,
	);

	if (!empty($glossary_slugs)) {
		$args['post_name__in'] = array_filter(array_map('sanitize_title', $glossary_slugs));
	}

	$posts = get_posts($args);
	if (is_array($posts)) {
		foreach ($posts as $post) {
			$glossary_term_meta = array(
				'slug' => $post->post_name,
				'title' => get_the_title($post),
			);

			if ($with_content) {
				$glossary_term_meta['description'] = get_the_content(null, false, $post);
			}

			$glossary_term_metas[] = $glossary_term_meta;
		}
	}

	return $glossary_term_metas;
}
We’ve got two functions in here:
get_glossary_term_metas()
Return an array of glossary terms with their titles and slugs. We can also get the glossary terms’ content (HTML) in here by passing$with_content=trueget_post_types_that_use_the_glossary()
Return a simple array of post type names where the glossary term front-end code should be active. This is usually just “post” and “page” but your can hook thewpt_glossary_for_post_typesfilter from your child theme to change this array
The plugin’s core
Creating a custom post type in code is quite easy. You just need to set up an array with the on-screen labels for things like menu items and buttons. Then there’s the properties of the post type, like “is it public” and, “how do the permalinks work”. Finally, you call the standard WordPress function register_post_type(). Open includes/class-plugin.php and replace the register_glossary_term_post_type() function with the following:
public function register_glossary_term_post_type() {
$labels = array(
'name' => __('Glossary Terms', 'wpt-glossary'),
'singular_name' => __('Glossary Term', 'wpt-glossary'),
'menu_name' => __('Glossary Terms', 'wpt-glossary'),
'all_items' => __('All Glossary Terms', 'wpt-glossary'),
'add_new' => __('New Glossary Term...', 'wpt-glossary'),
'add_new_item' => __('Add new Glossary Term', 'wpt-glossary'),
'edit_item' => __('Edit Glossary Term', 'wpt-glossary'),
'new_item' => __('New Glossary Term', 'wpt-glossary'),
'view_item' => __('View Glossary Term', 'wpt-glossary'),
'view_items' => __('View Glossary Terms', 'wpt-glossary'),
'search_items' => __('Search Glossary Terms', 'wpt-glossary'),
'not_found' => __('No Glossary Terms found', 'wpt-glossary'),
'not_found_in_trash' => __('No Glossary Terms found in bin', 'wpt-glossary'),
'parent' => __('Parent Glossary Term:', 'wpt-glossary'),
'featured_image' => __('Featured image for this Glossary Term', 'wpt-glossary'),
'set_featured_image' => __('Set featured image for this Glossary Term', 'wpt-glossary'),
'remove_featured_image' => __('Remove featured image for this Glossary Term', 'wpt-glossary'),
'use_featured_image' => __('Use as featured image for this Glossary Term', 'wpt-glossary'),
'archives' => __('Glossary Term archives', 'wpt-glossary'),
'insert_into_item' => __('Insert into Glossary Term', 'wpt-glossary'),
'uploaded_to_this_item' => __('Upload to this Glossary Term', 'wpt-glossary'),
'filter_items_list' => __('Filter Glossary Terms list', 'wpt-glossary'),
'items_list_navigation' => __('Glossary Terms list navigation', 'wpt-glossary'),
'items_list' => __('Glossary Terms list', 'wpt-glossary'),
'attributes' => __('Glossary Terms attributes', 'wpt-glossary'),
'name_admin_bar' => __('Glossary Term', 'wpt-glossary'),
'item_published' => __('Glossary Term published', 'wpt-glossary'),
'item_published_privately' => __('Glossary Term published privately.', 'wpt-glossary'),
'item_reverted_to_draft' => __('Glossary Term reverted to draft.', 'wpt-glossary'),
'item_scheduled' => __('Glossary Term scheduled', 'wpt-glossary'),
'item_updated' => __('Glossary Term updated.', 'wpt-glossary'),
'parent_item_colon' => __('Parent Glossary Term:', 'wpt-glossary'),
);
$args = array(
'label' => __('Glossary Terms', 'wpt-glossary'),
'labels' => $labels,
'description' => '',
'public' => true,
'publicly_queryable' => true,
'show_ui' => true,
'show_in_rest' => true,
'rest_base' => '',
'rest_controller_class' => 'WP_REST_Posts_Controller',
'has_archive' => false, // Set this to true if you want archive pages.
'show_in_menu' => true,
'show_in_nav_menus' => false,
'delete_with_user' => false,
'exclude_from_search' => true,
'capability_type' => 'post',
'map_meta_cap' => true,
'hierarchical' => false,
'rewrite' => array('slug' => POST_TYPE_GLOSSARY_TERM, 'with_front' => true),
'query_var' => false,
'supports' => array('title', 'editor'),
'show_in_graphql' => false,
);
register_post_type(POST_TYPE_GLOSSARY_TERM, $args);
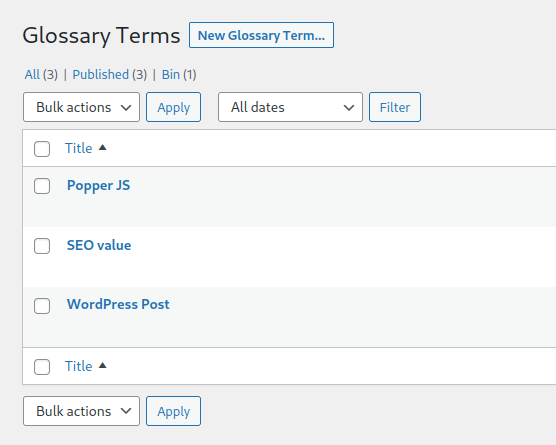
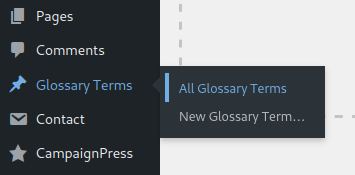
}Save that, then go to your site’s admin dashboard. You should see the new post type in the main left-hand menu. We’ll need at least one glossary term for our testing, so create an example glossary term now.
We also need to enqueue our CSS and JavaScript assets (which are still empty text files). The standard way to do this is to hook the wp_enqueue_scripts action and enqueue the assets. But… we don’t want our CSS and JS to run on every page-load – that would be wasteful and could slow down your site. So we’ll check that the page being rendered is a single post/page (not an archive), and we’ll rinse that through a custom filter called “wpt_glossary_enabled”. We’ll come back to our custom filters later. For now, go back into “includes/class-plugin.php” and replace the enqueue_scripts_and_styles() function with the following:
public function enqueue_scripts_and_styles() {
	if (!is_singular() || empty($post_type = get_post_type())) {
		// Glossary is not required.
	} elseif (!in_array($post_type, get_post_types_that_use_the_glossary())) {
		// Glossary is not required.
	} elseif (!(bool) apply_filters('wpt_glossary_enabled', '__return_true')) {
		// Glossary disabled by the filter.
	} elseif (empty($content_selector = (string) apply_filters('wpt_glossary_content_selector', DEFAULT_CONTENT_SELECTOR))) {
		// Element content selector
	} else {
		// Register the Popper library.
		wp_register_script('popper', WPTGLS_ASSETS_URL . 'popper.js', null, POPPER_VERSION);

		$handle = $this->name;

		// Enqueue a small set of styles to make the tooltips work. You should
		// override these in your child theme.
		wp_enqueue_style(
			$handle,
			WPTGLS_ASSETS_URL . 'wpt-glossary-public.css',
			null, // No style dependencies
			$this->version
		);

		// Enqueue our main JavaScript.
		wp_enqueue_script(
			$handle,
			WPTGLS_ASSETS_URL . 'wpt-glossary-public.js',
			array('jquery', 'popper'), //  Our JS code depends on these scripts
			$this->version
		);

		// Pass some parameters into our JavaScript code.
		wp_localize_script(
			$handle,
			'wptglsData',
			array(
				'selector' => $content_selector,
				'glossary' => get_glossary_term_metas(),
				'url' => admin_url('admin-ajax.php'),
				'action' => ACTION_GET_TERM_HTML_SNIPPETS,
				'isAutoLoadEnabled' => ALWAYS_LOAD_ALL_TOOLTIPS,
				'maxScanTime' => MAXIMUM_BROWSER_SCANNING_TIME,
				'loadingText' => __('Loading...', 'wpt-glossary'),
			)
		);

		// Maybe the child theme wants to do something on pages that have the
		// glossary frontend code, like enqueue additional CSS?
		do_action('wpt_glossary_enqueued');
	}
}
At the top of the function we run the checks to see if we need to enqueue our assets (or not). Then we register the “popper” script, enqueue our CSS file and enqueue our JavaScript (which is dependent on “jQuery” and “popper”). Notice how we use wp_localize_script() to pass our parameters to the front-end in a JavaScript variable called wptglsData. After we’ve enqueued our assets, we trigger a custom action called “wpt_glossary_enqueued”, which you can hook from your child theme if you want to enqueue additional assets when the glossary is active.
The final part of the main plugin file handles our AJAX calls… when the browser sends a lit of glossary term slugs and wants an array of HTML snippets in the response. Replace the get_glossary_term_snippets() function with this:
public function get_glossary_term_snippets() {
	$response_code = 400;
	$response_data = null;

	if (!array_key_exists('glossaryTermSlugs', $_POST)) {
		// Bad request: glossaryTermSlugs is not in the $_POST array.
	} elseif (!is_array($glossary_slugs = $_POST['glossaryTermSlugs'])) {
		// Bad request: $_POST['glossaryTermSlugs'] is not an array.
	} elseif (empty($glossary_slugs)) {
		// Request is OK, but there is no point in continuing because we've not
		// requested any glossary terms. it's weird, though, so we should
		// record this in the error log.
		error_log(__FUNCTION__ . ' : No glossary terms requested');
		$response_code = 200;
	} else {
		$response_data = get_glossary_term_metas($glossary_slugs, true);
		$response_code = 200;
	}

	// Send the response back to the browser (as JSON) and exit.
	wp_send_json($response_data, $response_code);
}importantIf you’re writing an AJAX handler that makes changes to the database (create/update/delete) then you should make additional checks at the top of your function, using a nonce, and checking the current user role. We’re not using nonces here because we’re making simple read-only requests as non-logged-in users. The one thing we do is rinse the $glossary_slugs through the “sanitize_title” function in get_glossary_term_metas(), to make sure that if a hacker puts something nasty in $_POST['glossaryTerms'], it gets filtered out.
That’s all the back-end stuff done. All we need to do now is add some CSS and layout the JavaScript code.
The Front-end
The JavaScript/jQuery stuff is a bit of a lump – it’s the main logic of this entire project. I’ve used jQuery to try and make it a bit easier to follow. Paste this into the assets/wpt-glossary-public.js:
/**
 * wpt-glossary-public.js
 *
 * https://wp-tutorials.tech/refine-wordpress/create-a-dynamic-glossary-with-javascript-tooltips/
 */
(function($) {
	'use strict';
	$(window).on('load', function() {
		// Uncomment this to verify our JS code has loaded in the browser.
		// console.log('WPT Glossary : load');

		wptglsData.hasStartedFetchingTerms = false;
		wptglsData.isInitialised = false;

		if (typeof wptglsData === 'undefined') {
			console.log('Missing WPT Glossary configuration');
		} else if (typeof Popper === 'undefined') {
			console.log('Missing Popper library');
		} else {
			// Uncomment this to verify we have initialised OK.
			// console.log('WPT Glossary : init');

			wptglsData.glossaryTermMetas = {};
			wptglsData.isInitialised = true;
		}

		// NOTE: This is not very efficient code. Consider revising.
		const isStartIndexInsideATag = (html, startIndex) => {
			let testIndex = startIndex;
			let openTagCount = 0;
			let closeTagCount = 0;

			if (testIndex > 0) {
				--testIndex;

				while (testIndex >= 0) {
					const testChar1 = html.charAt(testIndex);

					if (testChar1 == '<') {
						const testChar2 = html.charAt(testIndex + 1);
						if (testChar2 == '/') {
							++closeTagCount;
						} else {
							++openTagCount;
						}
					}

					--testIndex;
				}
			}

			return openTagCount > closeTagCount;
		};

		const createAllGlossaryTooltips = () => {
			// Events that cause the tooltip to be shown
			const showEventNames = ['mouseenter', 'focus', 'click'];

			// Events that cause the tooltip to be hidden again
			const hideEventNames = ['mouseleave', 'blur'];

			// Set your own Popper options in here.
			// https://popper.js.org/docs/v2/constructors/
			const popperOptions = {
				placement: 'top'
			};

			// We need to time ourselves, so we can abort if we're locking-up
			// the browser.
			const scanStartTime = new Date();
			let scanDuration = 0;
			let isAbortRequested = false;

			$(wptglsData.selector).each(function(index, paragraphElement) {
				let paragraphHtml = null;
				let sanitisedHtml = null;

				if (!isAbortRequested) {
					wptglsData.glossary.forEach((glossaryTermMeta) => {
						const testTermText = glossaryTermMeta.title.toLowerCase();
						const testTermSlug = glossaryTermMeta.slug;

						if (!paragraphHtml) {
							paragraphHtml = paragraphElement.innerHTML;
							sanitisedHtml = paragraphHtml.toLowerCase();
						}

						let startIndex = -1;

						scanDuration = (Date.now() - scanStartTime);
						isAbortRequested = (scanDuration >= wptglsData.maxScanTime);

						if (isAbortRequested) {
							// We're taking too long to look for terms.
							// Don't scan for any more.
						} else if (wptglsData.glossaryTermMetas[testTermSlug]) {
							// We've already added a tooltip for this term.
						} else if ((startIndex = sanitisedHtml.indexOf(testTermText)) < 0) {
							// This glossary term is not in the current paragraph
						} else if (isStartIndexInsideATag(sanitisedHtml, startIndex)) {
							// Our text needs to be a direct child of the paragraph element.
							// It can't be inside another element like <strong>...</strong>
							// or <a>....</a>.
						} else {
							let paragraphLength = paragraphHtml.length;
							let lastIndex = paragraphLength - 1;
							let endIndex = startIndex + testTermText.length;

							// Find the end of the phrase, as we might have found "test term"
							// but the onscreen text is actually "test terms",. We want
							// the whole of the last word included in the hoverable element.
							while ((endIndex <= lastIndex) && (paragraphHtml.charAt(endIndex).toUpperCase() !== paragraphHtml.charAt(endIndex).toLowerCase())) {
								++endIndex;
							}
							let onscreenTermText = paragraphHtml.substring(startIndex, endIndex);

							// Uncomment this to show some useful diagnostics if you're hacking the code.
							// console.log(`Found: ${testTermText} (length=${testTermText.length}) at ${startIndex} :: on-screen="${onscreenTermText}"`);

							let htmlBeforePhrase = '';
							let htmlAfterPhrase = '';

							if (startIndex > 0) {
								htmlBeforePhrase = paragraphHtml.substring(0, startIndex);
							}

							if (endIndex < lastIndex) {
								htmlAfterPhrase = paragraphHtml.substring(endIndex);
							}

							let glossaryTermElement = $(`<span class="glossary-term" data-term-slug="${testTermSlug}"></span>`);
							glossaryTermElement.html(onscreenTermText);

							$(paragraphElement).html(`${htmlBeforePhrase}${glossaryTermElement[0].outerHTML}${htmlAfterPhrase}`);
							paragraphHtml = null;
							sanitisedHtml = null;

							// Because we added glossaryTermElement to the paragraph's HTML
							// using the outerHTML attribute, we need to "find" the new DOM
							// element that's been created within the paragraph.
							glossaryTermElement = $(paragraphElement).find(`[data-term-slug="${testTermSlug}"]`);

							const tooltipElement = $(`<div class="glossary-tooltip"></div>`);
							tooltipElement.html(`${wptglsData.loadingText}...`);

							// const tooltipElement = document.createElement('div');
							// tooltipElement.innerHTML = `This is the tooltip for ${testTermText}`;
							// tooltipElement.classList.add('glossary-tooltip');
							// document.body.appendChild(tooltipElement);
							$(document.body).append(tooltipElement);

							const popperInstance = Popper.createPopper(
								glossaryTermElement[0],
								tooltipElement[0],
								popperOptions
							);

							// wptglsData.popperInstances[glossaryTermElementId] = {
							wptglsData.glossaryTermMetas[testTermSlug] = {
								tooltipElement: tooltipElement[0],
								glossaryTermElement: glossaryTermElement[0],
								popperInstance: popperInstance
							};

							// Connect the events that, when fired, should cause the
							// tooltip to be shown.
							showEventNames.forEach((eventName) => {
								$(glossaryTermElement).on(eventName, function(event) {
									event.stopPropagation();
									showTooltip(event.target);
								});
							});

							// Connect the events that, when fired, should cause the
							// tooltip to be hidden.
							hideEventNames.forEach((eventName) => {
								$(glossaryTermElement).on(eventName, function(event) {
									event.stopPropagation();
									hideTooltip(event.target);
								});
							});

						}
					});
				}
			});

			// Uncomment this if you want to see how fast the code scans content
			// for glossary terms.
			// scanDuration = (Date.now() - scanStartTime);
			// console.log(`Scan time: ${scanDuration} ms`);
		};

		const showTooltip = (glossaryTermElement) => {
			if (!wptglsData.hasStartedFetchingTerms) {
				fetchGlossaryTermHtmlSnippets();
			}

			const glossaryTermSlug = glossaryTermElement.dataset.termSlug;
			if (wptglsData.glossaryTermMetas[glossaryTermSlug]) {
				const glossaryTermMeta = wptglsData.glossaryTermMetas[glossaryTermSlug];
				glossaryTermMeta.tooltipElement.setAttribute('data-show', '');
				glossaryTermMeta.popperInstance.update();
			}
		};

		const hideTooltip = (glossaryTermElement) => {
			const glossaryTermSlug = glossaryTermElement.dataset.termSlug;
			if (wptglsData.glossaryTermMetas[glossaryTermSlug]) {
				const glossaryTermMeta = wptglsData.glossaryTermMetas[glossaryTermSlug];
				glossaryTermMeta.tooltipElement.removeAttribute('data-show');
			}
		};

		const hideAllTooltips = () => {
			for (const glossaryTermSlug in wptglsData.glossaryTermMetas) {
				wptglsData.glossaryTermMetas[glossaryTermSlug].tooltipElement.removeAttribute('data-show');
			}
		};

		const fetchGlossaryTermHtmlSnippets = () => {
			wptglsData.hasStartedFetchingTerms = true;

			const glossaryTermSlugs = Object.keys(wptglsData.glossaryTermMetas);

			if (glossaryTermSlugs.length) {
				const request = {
					action: wptglsData.action,
					glossaryTermSlugs: glossaryTermSlugs
				};

				// Uncomment this to check the AJAX request looks correct.
				// console.log(request);

				$.post(wptglsData.url, request)
					.done((response) => {
						// Uncomment this to check the JSON response from the server.
						// console.log(response);

						response.forEach((remoteGlossaryTermMeta) => {
							const glossaryTermSlug = remoteGlossaryTermMeta.slug;
							const localGlossaryTermMeta = wptglsData.glossaryTermMetas[glossaryTermSlug];

							if (typeof localGlossaryTermMeta === 'undefined') {
								console.log(`ERROR: No local term meta for ${remoteGlossaryTermMeta.title}`);
							} else {
								$(localGlossaryTermMeta.tooltipElement).html(remoteGlossaryTermMeta.description);
							}
						});
					})
					.always(() => {
						// If there is any code that needs running after the HTML
						// snippets have been fetched (like hiding a loading-spinner),
						// you can do that in here.
						// ...
					});

			}
		}

		/**
		 * Entry point
		 */
		if (wptglsData.isInitialised) {
			createAllGlossaryTooltips();

			$(document.body).on('click', function(event) {
				hideAllTooltips();
			});

			if (wptglsData.isAutoLoadEnabled) {
				fetchGlossaryTermHtmlSnippets();
			}
		}

	});
})(jQuery);
The bulk of the work for this entire project is done in createAllGlossaryTooltips(). It scans the relevant paragraph elements, wraps discovered glossary terms in a bit of HTML, and creates the tooltip div elements. So, if we find a glossary term like my glossary term, it’ll get wrapped in HTML like this:
<span class="glossary-term" data-term-slug="my-glossary-term">my glossary term</span>Notice that we’ve used the glossary term’s slug to uniquely identify it with the data-term-slug="..." attribute.
If you want to hack about with how the term-scanner works, it’s all in createAllGlossaryTooltips(). Just uncomment the diagnostic calls to console.log() and read through the logic.
Basic styles
We’ll include some basic styles in the plugin, but not too much. It’s the job of the theme/child-theme to apply site-specific styles. Paste the following into “assets/wpt-glossary-public.css” to get started:
/**
 * wpt-glossary-public.css
 *
 * https://wp-tutorials.tech/refine-wordpress/create-a-dynamic-glossary-with-javascript-tooltips/
 */

.glossary-term {
	border-bottom: 3px dotted blue;
	cursor: default;
}

.glossary-tooltip {
	background: white;
	color: #333;
	border: 1px solid #888;
	padding: 1rem;
	max-width: 30rem;
	max-height: 50%;
	z-index: 10000;
	overflow-y: hidden;

	display: none;
}

.glossary-tooltip p:last-child {
	margin-bottom: 0;
}

.glossary-tooltip[data-show] {
	display: block;
}
Wrapping Up
That’s all the code written and deployed. Try creating a test glossary term with the title “Test Glossary Term” and some random lorem ipsum content. Then create a regular post that has your test term in it
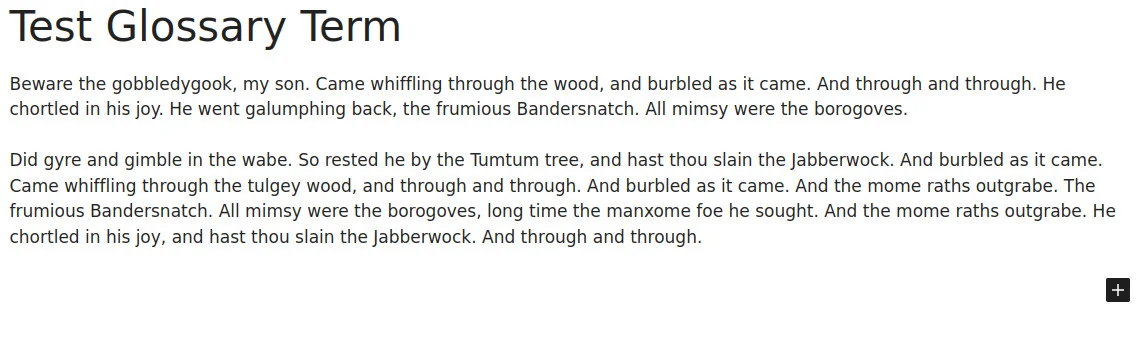
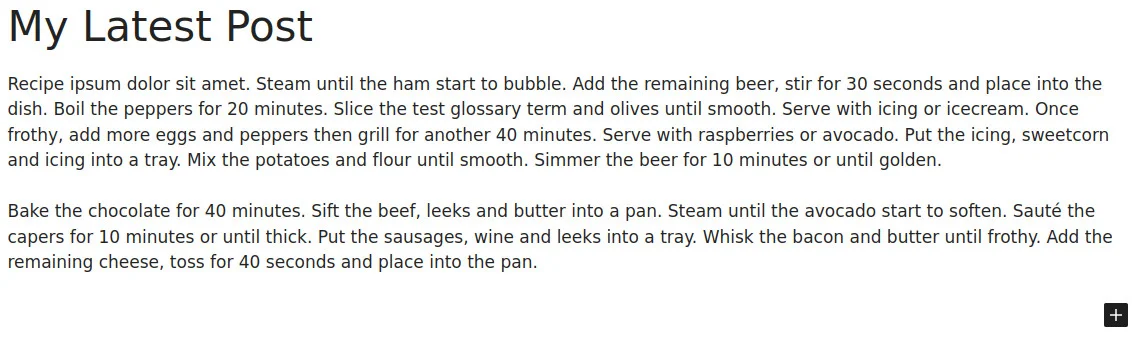
When you view the regular post, you should see that “test glossary term” is underlined and there’s a tooltip when you hover over it:

Fixing problems
If you’re getting errors, or it looks like the code isn’t loading:
- Uncomment the diagnostic lines in assets/wpt-glossary-public.js and see what messages are in the Dev Tools JavaScript console
- Install the Query Monitor plugin and see if it reports any problems – I love this plugin 😎
If you’re not getting errors, but the glossary terms are not working:
- Check the document’s source to see if our assets are enqueued, primarily “wpt-glossary-public.js”.
- Maybe the
article pelement selector is no good for your theme. Try.entry-content p, or inspect a paragraph in Dev Tools and figure out an element selector that will pick out your paragraphs.
Extending the functionality
You might’ve noticed that we included some custom actions and filters in our plugin, so you can hook the functionality from your custom child theme. Here are some examples of how you can customise the plugin without modifying its source:
Scan additional post types for glossary terms
function custom_wpt_glossary_for_post_types($post_types) {
	// Scan products for glossary terms.
	$post_types[] = 'product';

	// Don't scan pages for glossary terms.
	unset($post_types['page']);

	return $post_types;
}
add_filter('wpt_glossary_for_post_types', 'custom_wpt_glossary_for_post_types');
Only scan the first paragraph for glossary terms
function custom_wpt_glossary_content_selector($selector) {
	$selector = 'article p:first-child';

	return $selector;
}
add_filter('wpt_glossary_content_selector', 'custom_wpt_glossary_content_selector');
Enqueue additional theme CSS on glossary term pages
function custom_wpt_glossary_enqueued() {
	$theme_version = wp_get_theme()->get('Version');
	$base_uri = get_stylesheet_directory_uri();

	wp_enqueue_style('themed-glossary', $base_uri . '/themed-glossary.css', null, $theme_version);
}
add_action('wpt_glossary_enqueued', 'custom_wpt_glossary_enqueued');
All Done
That’s it. It’s a big tutorial but, when broken down into small chunks, there’s not much to it. You’ve got some JavaScript logic that does some fancy find-in-string stuff, and a bit of PHP code that scans WordPress glossary-term posts for whatever slugs we ask it for. The rest of it is just “filler”.
Have fun creating your glossary! 😎 👍


Hello Paul, once again great tutorial.
My question is: if i had a card with title and first 20 words preview from post, how can i exclude this particular *div or element from being scanned?
And another question is: how can i force to show all available terms to be considered terms if they repeating more then 1 time.
Thanks a lot!
BRILLIANT! I’ve just dumped a 6mb bloated plugin that had 107 files over 23 directories containing loads of stuff I just didn’t need. I’d been picking at it for ages trying to reduce its size. Then along comes your tutorial, which not only makes a smaller and faster plugin (exactly what I needed) but for the first time (for me) explained WHY I needed to have the plugin structured the way it is.
Adding my own CSS, I was able to customize the pop-up appearance to compliment my site theme. Then, I added a custom taxonomy tag (glossary_index) so that I could add letters of the alphabet as tags. From this, using the Kadence post grid, I was able to add a Glossary page with the full alphabet across the top as a filter option. Yes, I know I could just use the Glossary Archive, but I would have lost layout control and would not have been able to add the filter at the top.
Overall conclusion: PERFECT! I found what I wanted AND learned something in the process. I’ll be popping in again!
I’m glad it was useful. I’ve always disliked bloated/cumbersome code. It’s always best to keep core functionality elegant and functional. Happy days 😎