
This tutorial extends the standard WordPress Gallery Block by using Swiper and GLightbox. You can apply different gallery effects to the WordPress gallery block just by adding CSS Classes. It works a lot like our Masonry Gallery Tutorial, but instead of relying on Masonry for the layout and fslightbox.js for the light-box, it uses Swiper for the layout and GLightbox for the light-box.
importantMake sure you’re using a WordPress child theme so you can edit your functions.php file.


How It’s Going to Work
We’re going to use the same technique as in our Masonry Gallery Tutorial and Slide-show Tutorial. This involves hooking the render_block filter and detecting when WordPress tries to create the HTML for a gallery block. If a gallery block has the swiper-gallery CSS Class associated with it, our code will kick-in and override the default rendering with our own HTML.
According the the Swiper Demos we only need to generate quite simple HTML, like this:
<div class="wpt-swiper-gallery wpt-swiper-mode-cube" data-swiper-config="{...}">
	<div class="swiper">
		<div class="swiper-wrapper">
			<a class="swiper-slide"><img src="..." /></a>
			<a class="swiper-slide"><img src="..." /></a>
			<a class="swiper-slide"><img src="..." /></a>
			<a class="swiper-slide"><img src="..." /></a>
		</div>
		<div class="swiper-button-next"></div>
		<div class="swiper-button-prev"></div>
	</div>
</div>
The outermost div is not from the Swiper Docs – that’s our own container element where we can set a data-swiper-config property. This will hold the gallery’s configuration that we want to pass into JavaScript. It’s a standard technique, where we take a PHP associative array of properties & values, turn it into a JSON string and stuff it into an element’s data-swiper-config="{...}" property. In the browser, we extract the string from data-swiper-config="{...}" and convert it into a JavaScript object using JSON.parse("{...}").
Swiper Gallery Configuration in PHP
$swiper_configs = array(
	'effect' => 'coverflow',
	'grabCursor' => true,
	'centeredSlides' => true,
	'slidesPerView' => 'auto',
	'loop' => true,
	'coverflowEffect' => array(
		'rotate' => 25,
		'stretch' => 50,
		'depth' => 100,
		'modifier' => 1,
		'slideShadows' => true,
	),
);
Swiper Gallery Configuration as JSON
{
   "effect": "coverflow",
   "grabCursor": true,
   "centeredSlides": true,
   "slidesPerView": "auto",
   "loop": true,
   "coverflowEffect": {
      "rotate": 25,
      "stretch": 50,
      "depth": 100,
      "modifier": 1,
      "slideShadows": true
   }
}
Scaffold the Project
Start by making a new folder in your child theme called “wpt-swiper-gallery”. This is where we’re going to put all the third-party assets, along with our our JavaScript and CSS files.
We’re going to be using two external projects in this tutorial:
- Swiper: This JavaScript library does the slider/swiper gallery magic, with the effects, pagination, navigation arrows, etc. This tutorial was written for, and tested against, Swiper version 8.1.6.
- GLightbox: A JavaScript light-box library that does the full-screen zoom-to-image stuff, and can also swipe left/right through the gallery images. We’ve used version 3.2.0 in this tutorial.
Download Swiper
Go to the Swiper v8 Download page and grab “swiper-bundle.min.css” & “swiper-bundle.min.js” – these are the core files and we can ignore everything else that’s in there. Place these two files in your child theme’s “wpt-swiper-gallery” folder.
Download GLightbox
Go to the GLightbox project page and hit Download. This will download a file called “glightbox-master.zip”. Unzip this and go into the “dist” (distribution) folder. Find “glightbox.min.css” & “glightbox.min.js” and place both of these in your child theme’s “wpt-swiper-gallery” folder.
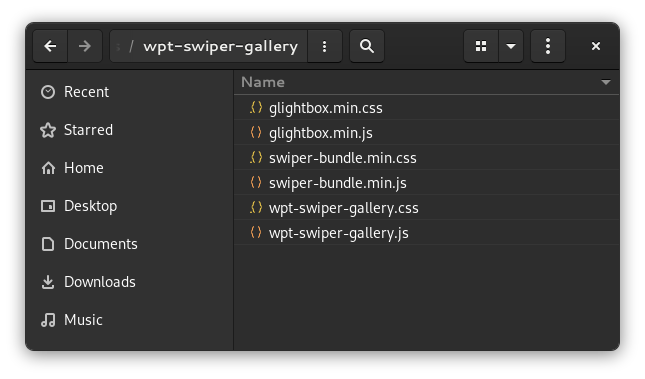
Create two empty files in your child theme’s “wpt-swiper-gallery” folder, called “wpt-swiper-gallery.css” and “wpt-swiper-gallery.js”. These are where we’ll put our own front-end code. You should end up with a set of files like this:
Next up, go back in to your child theme’s main folder, create a new file called “wpt-swiper-gallery.php” and paste the following into it:
<?php

/**
 * WP Tutorials : Swiper JS Gallery (WPTJGS)
 *
 * https://wp-tutorials.tech/refine-wordpress/multiple-gallery-effects-with-swiper/
 */

defined('WPINC') || die();

function wptsjg_render_gallery(string $block_content, array $block) {
	return $block_content;
}
add_filter('render_block', 'wptsjg_render_gallery', 50, 2);
Finally, open your child theme’s functions.php and add the following couple of lines:
// WP Tutorials : Swiper JS Gallery (WPTSJG)
require_once dirname(__FILE__) . '/wpt-swiper-gallery.php';
Save all that, reload some content on your site and make sure nothing has broken. That’s the foundations sorted.
The Back-end PHP Code
Open wpt-swiper-gallery.php and paste the following lump of code into it, replacing what’s already in there.
<?php

/**
 * WP Tutorials : Swiper JS Gallery (WPTSJG)
 *
 * https://wp-tutorials.tech/refine-wordpress/multiple-gallery-effects-with-swiper/
 */

defined('WPINC') || die();

const WPTSJG_CLASS_NAME = 'swiper-gallery';
const WPTSJG_GALLERY_BLOCK_NAME = 'core/gallery';
const WPTSJG_IMAGE_BLOCK_NAME = 'core/image';
const WPTSJG_CLASS_MODE_PREFIX = 'swiper-mode-';
const WPTSJG_DEFAULT_IMAGE_SIZE = 'full';
const WPTJGS_NAVIGATION_CLASS = 'swiper-navigation';
const WPTJGS_PAGINATION_CLASS = 'swiper-pagination';
const WPTJGS_SWIPER_VERSION = '8.1.6';
const WPTJGS_GLIGHTBOX_VERSION = '3.2.0';

/**
 * Enqueue all the front-end assets for this project.
 */
function wptsjg_enqueue_assets() {
	global $wptsjg_have_styles_been_enqueued;

	if (is_null($wptsjg_have_styles_been_enqueued)) {
		$base_uri = get_stylesheet_directory_uri() . '/';
		$version = wp_get_theme()->get('Version');
		$handle = 'wptsjg';

		// Enqueue Swiper's front-end assets.
		wp_enqueue_script('swiperjs', $base_uri . 'wpt-swiper-gallery/swiper-bundle.min.js', null, WPTJGS_SWIPER_VERSION);
		wp_enqueue_style('swiperjs', $base_uri . 'wpt-swiper-gallery/swiper-bundle.min.css', null, WPTJGS_SWIPER_VERSION);

		// Enqueue GLightbox's front-end assets..
		wp_enqueue_script('glightbox', $base_uri . 'wpt-swiper-gallery/glightbox.min.js', null, WPTJGS_GLIGHTBOX_VERSION);
		wp_enqueue_style('glightbox', $base_uri . 'wpt-swiper-gallery/glightbox.min.css', null, WPTJGS_GLIGHTBOX_VERSION);

		wp_enqueue_style(
			$handle,
			$base_uri . 'wpt-swiper-gallery/wpt-swiper-gallery.css',
			null, // No style dependencies
			$version
		);

		wp_enqueue_script(
			$handle,
			$base_uri . 'wpt-swiper-gallery/wpt-swiper-gallery.js',
			array('swiperjs', 'glightbox'),
			$version
		);

		$wptsjg_have_styles_been_enqueued = true;
	}
}

/**
 * Configurations for Swiper. You can add your own configurations in here if
 * you want more effects.
 */
function wptsjg_get_swiper_config(string $mode) {
	global $wptsjg_swiper_configs;

	if (is_null($wptsjg_swiper_configs)) {
		$wptsjg_swiper_configs = array(
			'cards' => array(
				'effect' => 'cards',
				'grabCursor' => true,
			),
			'coverflow' => array(
				'effect' => 'coverflow',
				'grabCursor' => true,
				'centeredSlides' => true,
				'slidesPerView' => 'auto',
				'loop' => true,
				'coverflowEffect' => array(
					'rotate' => 25,
					'stretch' => 50,
					'depth' => 100,
					'modifier' => 1,
					'slideShadows' => true,
				),
			),
			'cube' => array(
				'effect' => 'cube',
				'grabCursor' => true,
				'loop' => true,
				'cubeEffect' => array(
					'shadow' => true,
					'slideShadows' => true,
					'shadowOffset' => 20,
					'shadowScale' => 0.94,
				),
			),
		);
	}

	// If $mode is empty, or we don't have a configuration for the requested
	// mode/effect, grab the name of the first configuration that's available.
	if (empty($mode) || !array_key_exists($mode, $wptsjg_swiper_configs)) {
		$mode = array_keys($wptsjg_swiper_configs)[0];
	}

	return $wptsjg_swiper_configs[$mode];
}

/**
 * Intercept when WordPress tries to render a gallery block. Override the output
 * HTML if the gallery block has swiper-gallery in its CSS Class list.
 */
function wptsjg_render_gallery(string $block_content, array $block) {
	if (is_admin() || wp_doing_ajax()) {
		// We're not in the front-end.. Don't do anything.
	} elseif ($block['blockName'] != WPTSJG_GALLERY_BLOCK_NAME) {
		// This isn't a WP Gallery block.
	} elseif (!array_key_exists('attrs', $block)) {
		// The gallery block has no attributes.
	} elseif (!array_key_exists('className', $block['attrs'])) {
		// The className attribute is not specified.
	} elseif (empty($class_name = $block['attrs']['className'])) {
		// The className attribute is empty.
	} elseif (empty($gallery_classes = array_filter(explode(' ', $class_name)))) {
		// The className attribute is empty.
	} elseif (!in_array(WPTSJG_CLASS_NAME, $gallery_classes)) {
		// "swiper-gallery" isn't in the list of CSS Classes for the block.
	} elseif (empty($inner_blocks = $block['innerBlocks'])) {
		// The gallery has no image blocks in it.
	} else {
		$image_size = WPTSJG_DEFAULT_IMAGE_SIZE;
		if (array_key_exists('sizeSlug', $block['attrs'])) {
			$image_size = $block['attrs']['sizeSlug'];
		}

		// Create a unique name/id for this gallery.
		global $wptjgs_gallery_index;
		if (is_null($wptjgs_gallery_index)) {
			$wptjgs_gallery_index = 1;
		}
		$gallery_name = 'wptjgs-gallery-' . $wptjgs_gallery_index;

		// Loop through the CSS Classes assigned to the gallery block, looking for
		// the swiper mode and whether pagination/navigation should be enabled.
		$mode = '';
		$prefix = WPTSJG_CLASS_MODE_PREFIX;
		$prefix_length = strlen(WPTSJG_CLASS_MODE_PREFIX);
		$is_navigation_enabled = false;
		$is_pagination_enabled = false;
		$outer_classes = array();

		foreach ($gallery_classes as $gallery_class) {
			if (strpos($gallery_class, $prefix) === 0) {
				$mode = substr($gallery_class, $prefix_length);
			} elseif ($gallery_class == WPTJGS_NAVIGATION_CLASS) {
				$is_navigation_enabled = true;
			} elseif ($gallery_class == WPTJGS_PAGINATION_CLASS) {
				$is_pagination_enabled = true;
			} elseif ($gallery_class == WPTSJG_CLASS_NAME) {
				// Don't pass this class through - it's our control class.
			} else {
				// Pass the CSS Class through to our outer container.
				$outer_classes[] = $gallery_class;
			}
		}

		// Insert our main CSS Classes to the beginning of the array of classes
		// for our outer container.
		array_unshift($outer_classes, 'wpt-swiper-mode-' . $mode);
		array_unshift($outer_classes, 'wpt-swiper-gallery');

		// Get the Swiper configuration for the mode/effect we want.
		$swiper_config = wptsjg_get_swiper_config($mode);

		// Maybe add navigation to the Swiper configuratoin.
		if ($is_navigation_enabled) {
			$swiper_config['navigation'] = array(
				'nextEl' => sprintf('#%s .swiper-button-next', esc_attr($gallery_name)),
				'prevEl' => sprintf('#%s .swiper-button-prev', esc_attr($gallery_name)),
			);
		}

		// Maybe add pagination to the Swiper configuratoin.
		if ($is_pagination_enabled) {
			$swiper_config['pagination'] = array(
				'el' => sprintf('#%s .swiper-pagination', esc_attr($gallery_name)),
			);
		}

		// Enqueue all the frontend assets for Swiper, GLightbox
		// and our own CSS/JS.
		wptsjg_enqueue_assets();

		// Start creating our HTML with an ourter DIV and a JSON representation
		// of Swiper's configuration.
		$block_content = sprintf(
			'<div id="%s" class="%s" data-swiper-config="%s">',
			esc_attr($gallery_name),
			esc_attr(implode(' ', $outer_classes)),
			esc_attr(json_encode($swiper_config))
		);
		$block_content .= '<div class="swiper">';
		$block_content .= '<figure class="swiper-wrapper">';

		// Loop through the inner image blocks and pull out the image metas.
		$image_index = 0;
		foreach ($inner_blocks as $inner_block) {
			if ($inner_block['blockName'] != WPTSJG_IMAGE_BLOCK_NAME) {
				// ...
			} elseif (($image_id = intval($inner_block['attrs']['id'])) <= 0) {
				// ...
			} else {
				// Get the image's meta data.
				$thumbnail_url = wp_get_attachment_image_url($image_id, $image_size);
				$fullsize_url = wp_get_attachment_image_url($image_id, 'full');
				$image_alt = get_post_meta($image_id, '_wp_attachment_image_alt', true);
				$image_caption = wp_get_attachment_caption($image_id);

				$link_props = '';
				if (!empty($image_caption)) {
					$link_props .= sprintf(' data-title="%s"', esc_attr($image_caption));
				}

				$image_props = '';
				if (!empty($image_alt)) {
					$image_props .= sprintf(' alt="%s"', esc_attr($image_alt));
				}

				if ($image_index > 0) {
					$image_props .= 'loading="lazy"';
				}

				// Render the HTML for this image's slide.
				$block_content .= sprintf(
					'<figure class="swiper-slide"><a href="%s" class="glightbox" %s><img src="%s" %s/></a></figure>',
					esc_url($fullsize_url),
					$link_props,
					esc_url($thumbnail_url),
					$image_props
				);
			}

			++$image_index;
		}

		$block_content .= '</figure>'; // .swiper-wrapper

		// Maybe add navigation to the Swiper configuratoin.
		if ($is_navigation_enabled) {
			$block_content .= '<div class="swiper-button-next"></div>';
			$block_content .= '<div class="swiper-button-prev"></div>';
		}

		// Maybe add pagination to the Swiper configuratoin.
		if ($is_pagination_enabled) {
			$block_content .= '<div class="swiper-pagination"></div>';
		}

		$block_content .= '</div>'; // .swiper
		$block_content .= '</div>'; // .wpt-swiper-gallery

		++$wptjgs_gallery_index;
	}

	return $block_content;
}
add_filter('render_block', 'wptsjg_render_gallery', 50, 2);
The code is commented, and only has three functions in it, so it should be easy to follow:
wptsjg_render_gallery() This function is called every time WordPress tries to render ANY block, so we need to run a bunch of checks to see if it’s trying to render a gallery block with our special CSS Class, “swiper-gallery”. Then we set up our options, create a Swiper configuration array encoded as JSON, loop through the gallery’s image blocks and render the HTML. Finally, we render the navigation/pagination HTML (if required) and close all figure/div tags.
wptsjg_get_swiper_config() is a utility function that takes a parameter called $mode, which can be something like “cube” or “coverflow”. It returns a Swiper configuration array, based on the Swiper Demos. Putting these configurations in a little function like this makes it easier to add new Swiper configurations without having to edit the core logic.
wptsjg_enqueue_assets() If the front-end assets haven’t already been enqueued, enqueue them now.
Styles for our Swiper Gallery
Open wpt-swiper-gallery/wpt-swiper-gallery.css and paste the following into it. This is just to get you started – you’ll probably want to alter it to suit your own projects.
/**
 * WP Tutorials : Swiper JS Gallery (WPTSJG)
 *
 * https://wp-tutorials.tech/refine-wordpress/multiple-gallery-effects-with-swiper/
 */

.wpt-swiper-gallery {
	position: relative;
	margin-bottom: 4em;
}

.swiper {
	/* ... */
}

.swiper-slide {
	background-position: center;
	background-size: cover;
}

.wpt-swiper-mode-cards .swiper-slide,
.wpt-swiper-mode-cube .swiper-slide {
	width: 100%;
	height: 20em;
}

.wpt-swiper-mode-coverflow .swiper-slide {
	width: 20em;
	height: 15em;
}

.swiper-slide a {
	display: block;
	width: 100%;
	height: 100%;
}

.swiper-slide a img {
	width: 100%;
	height: 100%;
	object-fit: cover;
}
The Front-end JavaScript
The final piece of our puzzle is a small chunk of JavaScript to tie it all together in the browser. The script needs to scan the DOM for our galleries, initialise Swiper for each gallery, and set up GLightbox too. Open wpt-swiper-gallery/wpt-swiper-gallery.js and paste the following into it:
/**
 * WP Tutorials : Swiper JS Gallery (WPTSJG)
 *
 * https://wp-tutorials.tech/refine-wordpress/multiple-gallery-effects-with-swiper/
 */
document.addEventListener('DOMContentLoaded', function() {
	'use strict';

	// Find all elements that have this property set:
	//    data-swiper-config="{...}"
	/// ...and call Swiper() for each one.
	document.querySelectorAll('[data-swiper-config').forEach(function(outerElement) {
		// Uncomment this to verify we're selecting the gallery elements.
		// console.log('Found a swiper gallery');

		// Get the actual element we're going to pass to Swiper.
		const swiperElement = outerElement.querySelector('.swiper');

		// Grab the configuration from the data-swiper-config property and
		// convert it from a JSON string into an object.
		const swiperConfig = JSON.parse(outerElement.dataset.swiperConfig);

		// Create this Swiper object.
		var swiper = new Swiper(
			swiperElement,
			swiperConfig
		);

		// Select all child elements that have the "gslightbox" CSS Class.
		const galleryItems = outerElement.querySelectorAll('.gslightbox');

		// Create the GLightbox obejct with this gallery's items.
		const lightbox = new GLightbox(galleryItems);
	});

});
Finish Up and Test
Save everything, create a gallery block and give it some CSS Classes, like this:
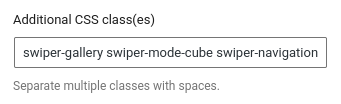


| CSS Class | Notes |
|---|---|
| swiper-gallery | Required. This is what “activates” our code on a gallery block. |
| swiper-mode-$mode | Optional. Choose which mode to operate in. The value of $mode relates to the array keys wptsjg_get_swiper_config(). Examples: “swiper-mode-cards”, “swiper-mode-coverflow” and “swiper-mode-cube”. |
| swiper-navigation | Optional: If specified, the gallery will have back/next buttons. |
| swiper-pagination | Optional: If specified, the gallery will have little pagination circles under the images. |
Extending the Tutorial
- Swiper provides lots more than the three effects we’ve shown here. Have a look at the Swiper Demos and add new entries to the
$wptsjg_swiper_configsarray to support more gallery effects. - Have a play with our animate-on-show tutorial to fade/zoom/slide the galleries into view when scrolling down the page.
That’s all – happy Swiper-ing 😎 👍


Great tutorial! Thanks a lot for this one.
Now the last thing remains to cover is this one
https://floating-ui.com/
Best wishes.
Richard
I’m glad you enjoyed the tutorial!
I’ll have a look into “floating-ui”, but the next tutorial will probably involve WooCommerce product schema.
Paul