Reconfigure the WooCommerce checkout fields so the placeholder labels are inside the field inputs. These compact placeholder labels will resize, depending on whether the fields contain data and/or have input focus. We’ll reconfigure our labels when the user changes billing/shipping country, because the “Billing State” field is sometimes input[type="text"], and at other times it’s a select element (depending on country).
Mini checkout demo
This demo is a (very) stripped-down version of the project’s CSS & JS. If you want to see the real code in action, go to our WordPress plugins shop, put something in your cart, then go to the checkout.
Project requirements
- The primary requirement is to reduce the amount of vertical space the checkout form uses.
- When an input field has a value, we still want to be able to see its field name.
If this wasn’t a requirement, we could just use the standard HTMLplaceholder="..."attribute. - This has to work with custom checkout fields.
- We must be able to exclude fields from our logic (by field ID).
- When the customer chooses a billing country where “Billing State” is a text field, our code needs to work as normal. But if a customer chooses a country where “Billing State” is a drop-down list, we want to remove the field’s label and change “Select an option…” to “State / county…”
Structure of WooCommerce checkout fields
Each field on the WooCommerce checkout is a p.form-row element that wraps a label and either an input[type="text"] or a select element. When the user changes their country, WooCommerce runs some JavaScript that can add/remove/change these fields… which is good for user-experience, but is annoying for us.
Here’s a simplified HTML snippet for a standard checkout field:
<p class="form-row" id="billing_address_1_field">
	<label for="billing_address_1">
		Street address
		<abbr class="required" title="required">*</abbr>
	</label>
	<span class="woocommerce-input-wrapper">
		<input type="text" name="billing_address_1" id="billing_address_1" />
	</span>
</p>
So what we’ll do is:
- For each
form-rowelement (container) that is eligible to be a “fancy placeholder” (i.e. not excluded from our logic)…- Add the class
has-fancy-placeholderto the container. - If the container contains an
inputelement, then…- When the input element’s value is not empty, add the
has-valueclass to the container.
Remove the class when the value becomes empty again. - When the user clicks the input element (so it has focus), add the
has-focusclass to the container.
Remove the class when the element loses focus again (blur).
- When the input element’s value is not empty, add the
- Add the class
Field is empty
<p class="has-fancy-placeholder form-row" id="...">
	<label for="...">Address</label>
	<span class="...">
		<input value="" type="text" name="..." id="..." />
	</span>
</p>
Field has a value
<p class="has-value has-fancy-placeholder form-row" id="...">
	<label for="...">Address</label>
	<span class="...">
		<input value="123 Fake Street" type="text" name="..." id="..." />
	</span>
</p>
We’ll have a couple of core JavaScript functions in our frontend code:
reconfigureFields(): This will scan all the DOM for allform-rowelements that contain either aninputor aselectelement, and configure them with thehas-fancy-placeholderclass (unless they’re excluded). Because checkout fields can change dynamically (without a full page reload), we need to be able to callreconfigureFields()multiple times so it can configure newly added fields. It should skip over fields that have already been configured on a previous iteration.refreshField(inputElement): Update aform-rowby adding/removing thehas-focusand/or thehas-valueclass.
The back-end PHP code just needs to enqueue our front-end assets, and pass some run-time parameters as a global JavaScript object (that our code can pick-up and use).
Scaffold the code
In your WordPress child theme, create three empty files:
- wpt-checkout-fancy-placeholders.php
- wpt-checkout-fancy-placeholders/wptcfp-checkout.css
- wpt-checkout-fancy-placeholders/wptcfp-checkout.js
Edit your child theme’s functions.php file and add the following couple of lines to it:
// Headwall WP Tutorials : Checkout Fancy Placeholders (WPTCFP)
require_once dirname(__FILE__) . '/wpt-checkout-fancy-placeholders.php';
Next, edit wpt-checkout-fancy-placeholders.php and paste the following into it:
<?php
/**
* Headwall WP Tutorials Checkout Fancy Placeholders : WPTCFP
*
* https://wp-tutorials.tech/refine-wordpress/show-woocommerce-checkout-labels-in-the-input-fields/
*
* Changelog
*
* 2023-12-25 : Added the reset-password user/email input to the element selectors.
*/
// Block direct access
defined('WPINC') || die();
const WPTCFP_INPUT_SELECTOR = 'form.checkout .form-row input[type="text"], form.checkout .form-row input[type="email"], form.checkout .form-row select, form.login input[type="text"], form.login input[type="password"], form.register input[type="email"], form.lost_reset_password input[type="text"]';
/**
* Default logic to control which pages have the labels-as-placeholders
* functionality.
* @return bool
*/
function wptcfp_are_assets_required() {
$are_assets_required = false;
// Check that WooCommerce is installed before calling things like is_checkout()
if (function_exists('WC')) {
$are_assets_required |= is_checkout();
$are_assets_required |= is_account_page() && !is_user_logged_in();
}
return apply_filters('wptcfp_are_assets_required', $are_assets_required);
}
function wptcfp_enqueue_scripts() {
if (wptcfp_are_assets_required()) {
$theme_version = wp_get_theme()->get('Version');
$base_uri = get_stylesheet_directory_uri();
$handle = 'wptcfp-checkout';
$selector = (string) apply_filters('wptcfp_input_selector', WPTCFP_INPUT_SELECTOR);
$ignore_fields = array('billing_search', 'shipping_search');
wp_enqueue_style(
$handle,
$base_uri . '/wpt-checkout-fancy-placeholders/wptcfp-checkout.css',
null,
$theme_version
);
wp_enqueue_script(
$handle,
$base_uri . '/wpt-checkout-fancy-placeholders/wptcfp-checkout.js',
array('jquery'),
$theme_version
);
wp_localize_script(
$handle,
'wptcfp',
array(
'isCheckout' => is_checkout(),
'selector' => apply_filters('wptcfp_input_selector', $selector),
'ignoreFields' => (array) apply_filters('wptcfp_ignore_fields', $ignore_fields),
)
);
}
}
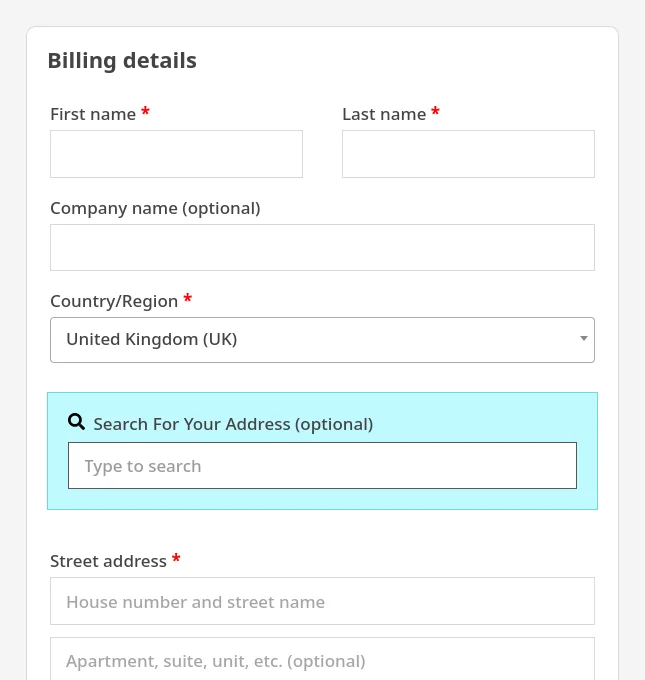
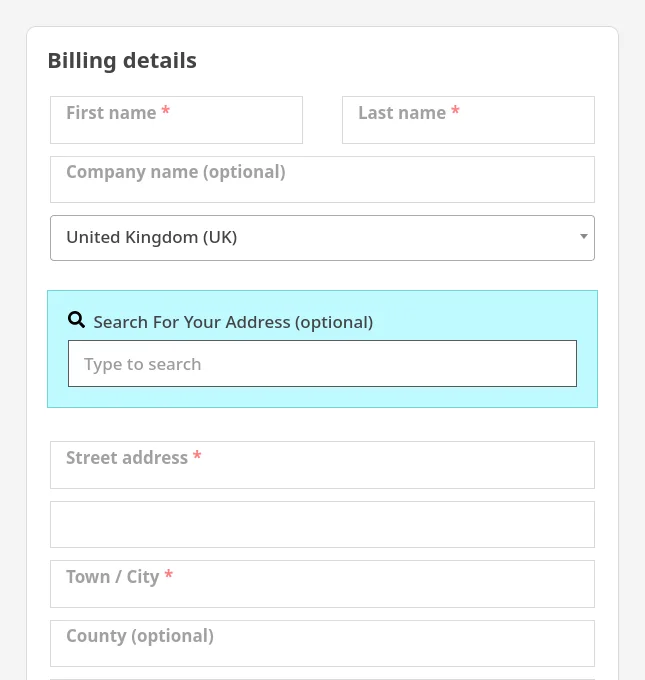
add_action('wp_enqueue_scripts', 'wptcfp_enqueue_scripts');See that we’re passing billing_search and shipping_search into ignoreFields. This is so we don’t affect our Google address lookup field. If you have any custom checkout fields that you want to exclude, add their IDs to the ignoreFields array too.
Core JavaScript functionality
Edit wptcfp-checkout.js and paste the following code into it. The code is fully commented, so you should be able to match up the code with the tutorial notes. Notice that we rely on the core JavaScript object called wptcfp, which is passed from the PHP code using wp_localize_script().
/**
 * Headwall WP Tutorials Checkout Fancy Placeholders : WPTCFP
 *
 * https://wp-tutorials.tech/refine-wordpress/show-woocommerce-checkout-labels-in-the-input-fields/
 *
 */

(function($) {
	'use strict';

	// Diagnostics.
	// console.log('Checkout Fancy Placeholders : load');

	if (typeof wptcfp !== 'undefined') {

		// Tidy up the wptcfp that was rinsed through json_encode()
		wptcfp.isCheckout = (wptcfp.isCheckout === '1');


		/**
		 * Initialise event handlers. If we're on the checkout page then we need
		 * to listen for init_checkout and updated_checkout. If we're not on the
		 * checkout page, just listen for the window's load event.
		 */
		wptcfp.init = () => {
			if (wptcfp.isCheckout) {
				// This is fired once, as WooComemrce configures the checkout.
				$(window).on('init_checkout', wptcfp.checkoutInitialised);

				// This can be fired multiple times, like when the shipping method
				// changes.
				$(window).on('updated_checkout', wptcfp.reconfigureFields);
			} else {
				$(window).on('load', wptcfp.reconfigureFields);
			}
		};


		/**
		 * After the checkout has initialised, listen for the country-change event
		 * and then configure the fields.
		 */
		wptcfp.checkoutInitialised = () => {
			// Diagnostics.
			// console.log('checkoutInitialised');

			// When the billing/shipping country changes, we need to refresh all our labels
			$('#billing_country, #shipping_country').on('change', wptcfp.refreshAllLabels);

			wptcfp.reconfigureFields();
		};


		/**
		 * Is this element eligible to be configures as a fancy placholder?
		 * @param  INPUT|SELECT   inputElement   The element to check
		 *                                       (not the form-row).
		 * @return bool
		 */
		wptcfp.isElementEligible = (inputElement) => {
			const id = $(inputElement).prop('id');
			return (id && !wptcfp.ignoreFields.includes(id));
		};


		/**
		 * This is our core function that scans all checkout INPUT/SELECT element,
		 * looking for fields elegible for fancy placeholders.
		 */
		wptcfp.reconfigureFields = () => {
			// Diagnostics
			// console.log('wptcfp : Configure fields');

			let elementCount = 0;

			$(wptcfp.selector).each(function(index, inputElement) {
				const formRow = $(inputElement).closest('.form-row');

				if (wptcfp.isElementEligible(inputElement)) {
					// It's safe to call addClass() even if the element already has
					// that class. jQuery checks first and won't add it multiple
					// times.
					$(formRow).addClass('has-fancy-placeholder');

					// We use the "has-events" class to record that we've already
					// connected an element's event handlers.
					if (!$(inputElement).hasClass('has-events')) {
						// We want to refresh the element when any of these evers are
						// triggered for it.
						$(inputElement).on('blur focus change validate', wptcfp.inputChanged);

						$(formRow).addClass('has-events');
					}

					wptcfp.refreshField(inputElement);

					++elementCount;
				}
			});

			// If we've (re)configured one or more elements, wait a small delay (50ms)
			// and then strip out any placeholders that WooCommerce might have
			// automatically (re)added.
			if (elementCount > 0) {
				setTimeout(wptcfp.stripHtmlPlacehodlers, 50);
			}
		};


		/**
		 * Find all elements that are eligible for fancy placehodlers, and remove
		 * built-in placeholders that WooCommerce might have automatically (re)added.
		 */
		wptcfp.stripHtmlPlacehodlers = () => {
			$(wptcfp.selector).each(function(index, inputElement) {

				if (wptcfp.isElementEligible(inputElement)) {
					$(inputElement).removeAttr('placeholder');
					$(inputElement).removeAttr('data-placeholder');
				}

			});
		};


		/**
		 * Handle when an input element has changed its value.
		 */
		wptcfp.inputChanged = (event) => {
			wptcfp.refreshField(event.target);
		};


		/**
		 * Refresh an individual field's properties.
		 */
		wptcfp.refreshField = (inputElement) => {
			if (wptcfp.isElementEligible(inputElement)) {
				const formRow = $(inputElement).closest('.form-row');
				const labelElement = $(inputElement).closest('label');

				const inputCount = $(formRow).find('input').length;
				const selectCount = $(formRow).find('select').length;

				// If this form-row has a SELECT element, but not an INPUT element,
				// hide the label now.
				if (selectCount && !inputCount) {
					$(labelElement).css('display', 'none');
				} else {
					$(labelElement).css('display', 'block');

					if ($(inputElement).is(":focus")) {
						$(formRow).addClass('has-focus');
					} else {
						$(formRow).removeClass('has-focus');
					}

					if ($(inputElement).val()) {
						$(formRow).addClass('has-value');
					} else {
						$(formRow).removeClass('has-value');
					}
				}
			}
		};


		/**
		 * Main entry point
		 */
		wptcfp.init();


	}

})(jQuery);
Inside the reconfigureFields() function, we add the has-events class to INPUT elements when we connect the blur/focus/change event-handler. This is so that when we call reconfigureFields() again, we can use hasClass() to see if we’ve already connected the event handlers, or if we need to connect them now.
Animated styles
The styles are straightforward, with most of the work being handled by “.woocommerce .form-row.has-fancy-placeholder label” and its transition property.
Paste these definitions into wptcfp-checkout.css and save everything:
/**
 * Headwall WP Tutorials Checkout Fancy Placeholders : WPTCFP
 *
 * https://wp-tutorials.tech/refine-wordpress/show-woocommerce-checkout-labels-in-the-input-fields/
 *
 */

/**
 * The form-row always needs to be relative, so the label (child) can be
 * absolutely positioned in relation to its container (the form-row).
 */
.form-row.has-fancy-placeholder {
	position: relative;
}

/**
 * These broadly match the CSS selector in WPTCFP_INPUT_SELECTOR
 * (in the PHP file)
 */
.form-row.has-fancy-placeholder input[type="text"],
.form-row.has-fancy-placeholder input[type="email"] {
	padding: 13px 15px 7px 15px;
}

.woocommerce .form-row.has-fancy-placeholder label {
	/* Diagnostics */
	/* background-color: pink; */

	position: absolute;
	width: 100%;
	height: 100%;
	left: 0;
	top: 0;
	padding-left: 20px;
	padding-top: 1px;
	font-weight: bold;
	pointer-events: none;
	transition: 0.3s font-size, 0.3s padding-top;
	cursor: default;
	line-height: unset;
	opacity: 0.50;
}

.woocommerce .form-row.has-fancy-placeholder label[for="password"] {
	z-index: 10;
}

.woocommerce .form-row.has-fancy-placeholder:not(.has-value) label {
	padding-top: 5px;
	font-size: 100%;
}

.woocommerce .form-row.has-fancy-placeholder.has-focus label,
.woocommerce .form-row.has-fancy-placeholder.has-value label {
	font-size: 70%;
}
Deploy, test and tweak
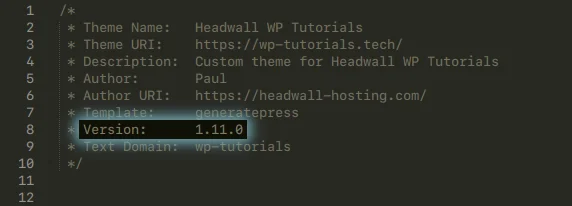
To make sure everything is working properly, bump the version of your child theme before you test. Open your child theme’s style.css and find “Version” in the header comments. The version should always be a sequence of three integers.
Increase the number on the right by one. In the example here, we would change the version to 1.11.1. The three numbers relate to Major, Minor and Patch, and are what’s called Semantic Versioning (semver).
Make sure everything is saved, then go to your checkout and test. It should “just work” and you’ll see instances of “wptcfp : Configure fields” in the JS Console when you open your browser’s Dev Tools. If it’s not working, uncomment the diagnostics console.log(...) near the top of the JavaScript and reload your checkout page. See if there are any references to “Checkout Fancy Placeholders : load” in the JS Console. If not, check the code is being referenced properly from your child theme’s “functions.php”.
When you change the billing country, you’ll see the built-in placeholder for “address_line_2” appears and then disappears. We can tidy that up by adding a snippet to the end wpt-checkout-fancy-placeholders.php:
/**
 * Remove the built-in placeholders for address line 1 and address line 2.
 */
function wptcfp_override_default_address_placeholders($fields) {
	unset($fields['address_1']['placeholder']);
	unset($fields['address_2']['placeholder']);

	// Change the placeholder for the billing/shipping state field.
	$fields['state']['placeholder'] = __('State / County...', 'wpt-tutorials');

	return $fields;
}
add_filter('woocommerce_default_address_fields', 'wptcfp_override_default_address_placeholders', 99, 1);
If the alignment of your mini labels isn’t quite right, don’t edit “wptcfp-checkout.css”. Instead, go to your child theme’s style.css and override it there:
.woocommerce .form-row.has-fancy-placeholder label {
	padding-top: 2px; /* tweak the top-align of the on-top fancy placeholders. */
	padding-left: 19px; /* tweak the left-align of the on-top fancy placeholders. */
}
This lets you use the same tutorial code in multiple projects, keeping your per-project overrides separated.
There you have it, a tidy and compact checkout form. Happy selling 😎 👍
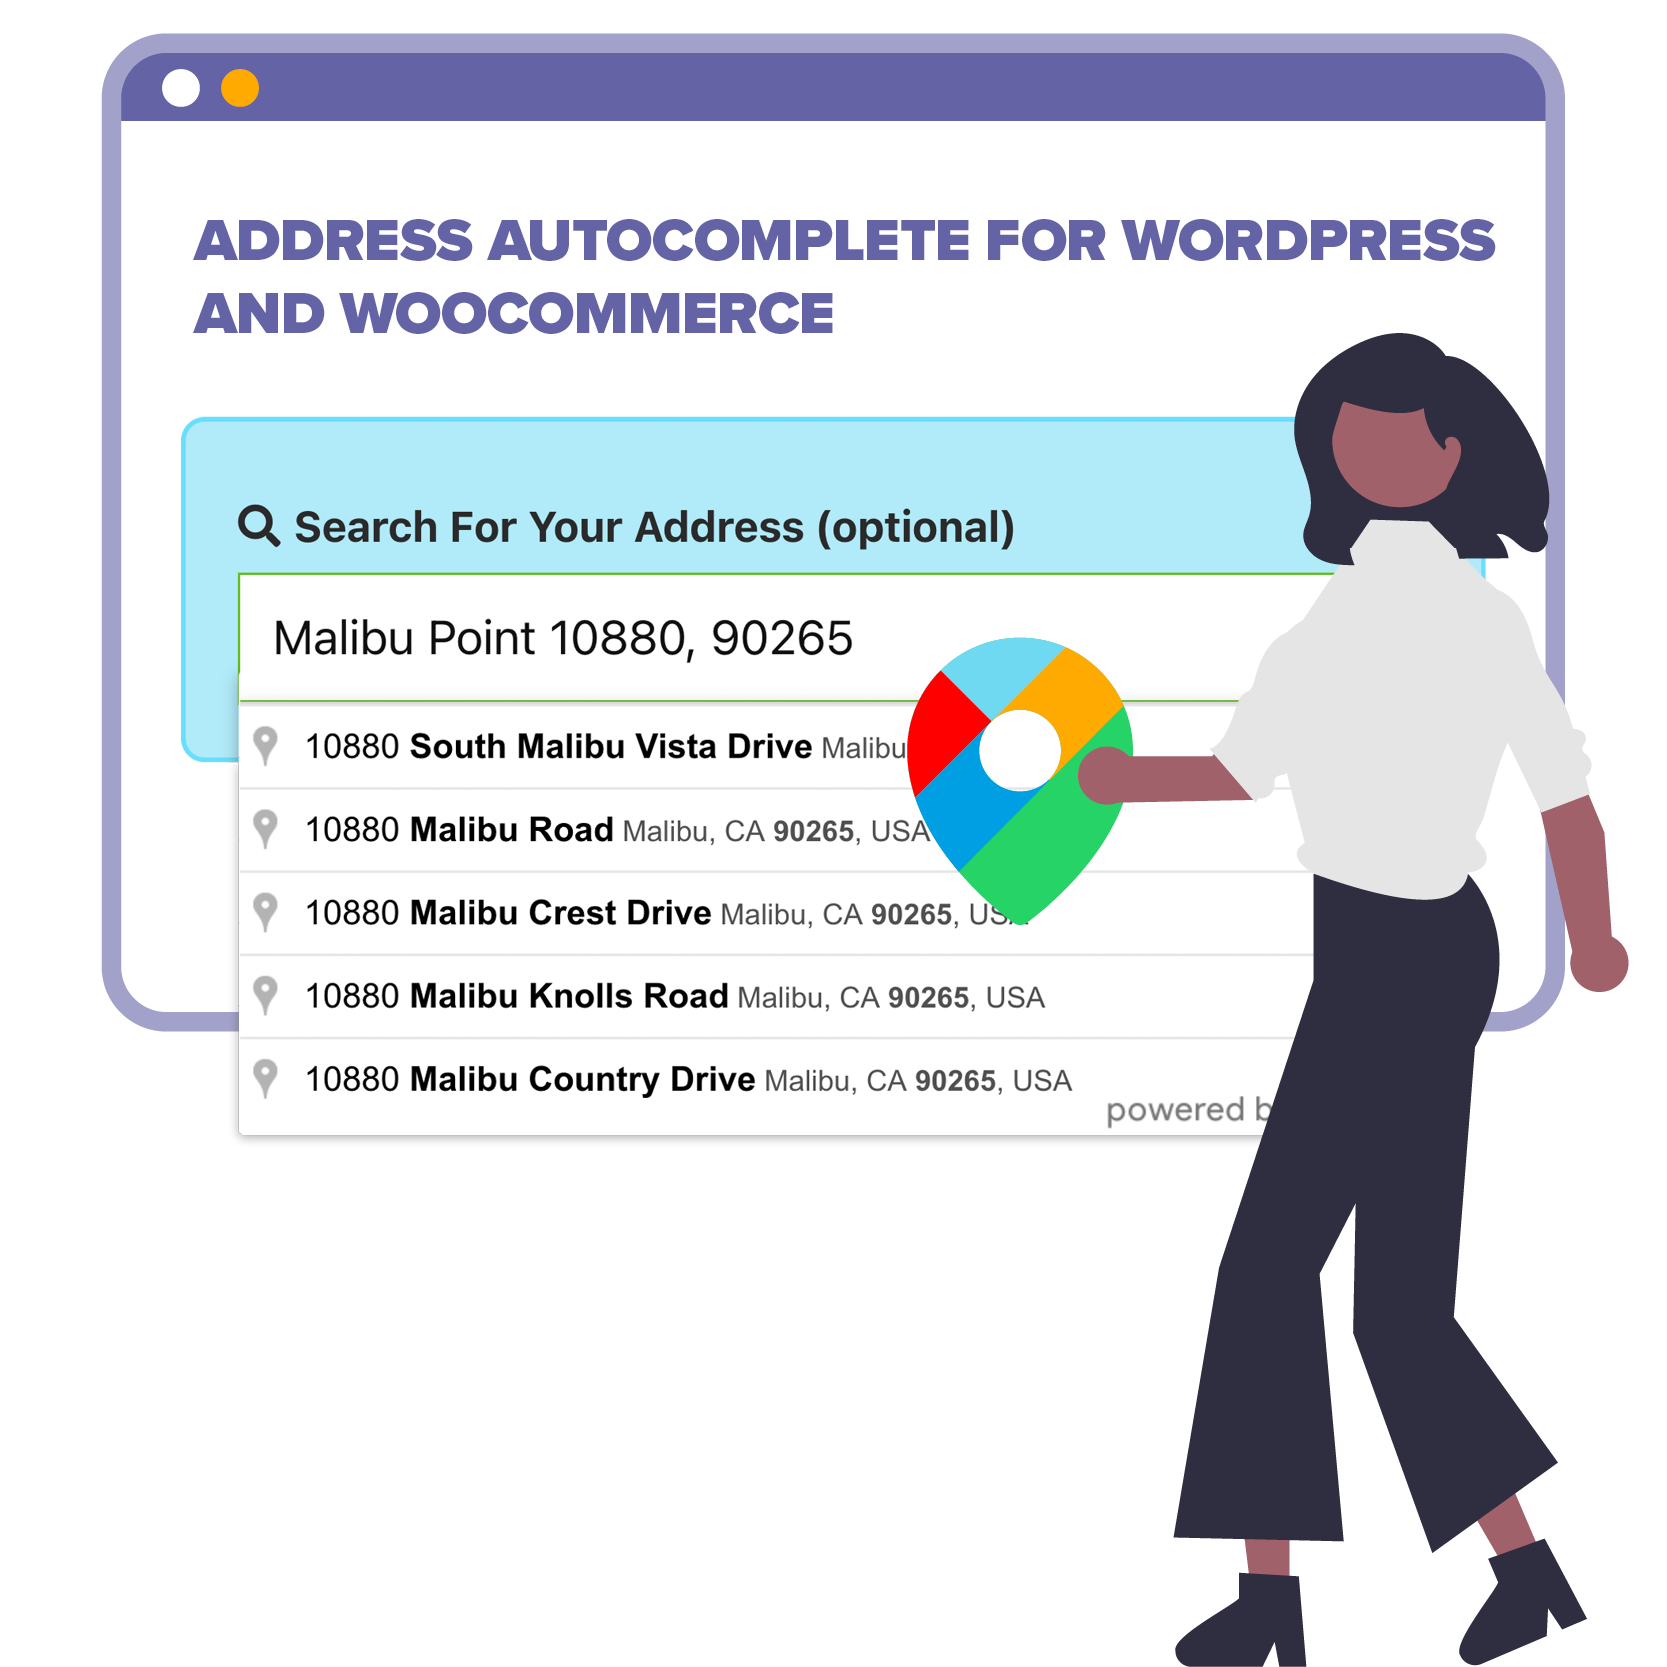
Featured plugin