
Learn how to create a scrolling post carousel for your WordPress site. SEO friendly and it can handle custom post types (any post type), including WooCommerce products. We’ll use PHP to create the HTML, an off-the shelf JavaScript library to do the scrolling stuff for us (which will work nicely on mobile devices) and we’ll tie it together with a bit of frontend JavaScript and CSS.
To keep things simple, we’ll create a shortcode. Shortcodes are a bit old-fashioned these days (we should be creating blocks now), but it means we can concentrate on the PHP and integrating the Glide.js library.
Ready-made plugin

The Power Slider plugin gives you multiple slider & carousel shortcodes, and… it makes it easy to add videos to your WooCommerce product gallery carousels, complete with VideoObject schema so your products show up in Google Video Search.
We’re Going to Make This 👇

Lock a WordPress user account to prevent login
A copy-and-paste tutorial that adds a “lock user account” function. Prevent individual users from logging in to your site.
Lock a WordPress user account to prevent loginRead More
Redirect draft posts to a URL instead of 404
This tutorial shows you how to redirect draft WordPress posts to a specific 301 URL instead of the standard 404 Not Found.
Redirect draft posts to a URL instead of 404Read More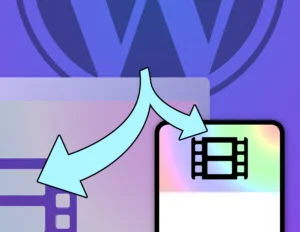
Responsive Videos in WordPress for Mobile & Desktop
A responsive video element to any WordPress block. Serves the best video URL for the browser’s device format. Great for page-speed.
Responsive Videos in WordPress for Mobile & DesktopRead More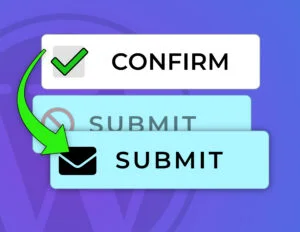
Disable a Button until Checkbox is Ticked in WordPress
Create a confirm-before-click checkbox for any button on your WordPress site. The button will be disabled until the checkbox is ticked.
Disable a Button until Checkbox is Ticked in WordPressRead More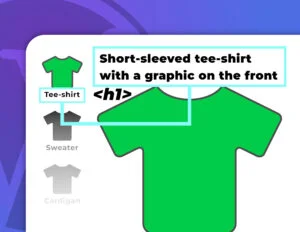
Fix SEO Warnings about H1 Title Being Too Short
Learn how to fix SEO warnings about the H1 title being too short for WooCommerce product pages. Great for when you need a descriptive product title but you don’t want to rename the underlying product.
Fix SEO Warnings about H1 Title Being Too ShortRead More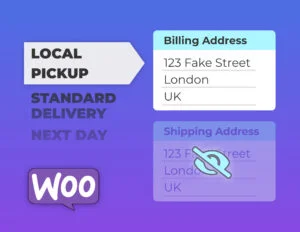
Hide Checkout Items Based on Shipping Method
A copy-and-paste tutorial that details how to hide/show elements on the WooCommerce checkout, depending on shipping method.
Hide Checkout Items Based on Shipping MethodRead More
Animate Search and Text Placeholders
Add text-reveal animations to input, search and text area placeholders on your WordPress site with this short copy-and-paste tutorial. It’s a neat UX enhancement for pages where you want to draw the user’s attention to an input box.
Animate Search and Text PlaceholdersRead More
Add a Low-Stock Filter to the WooCommerce Admin Area
In this tutorial, we’ll make a custom “low stock” filter for the WooCommerce products admin table. We’ll also override the “In stock” text (in the Stock column) to say “Low stock” where appropriate.
Add a Low-Stock Filter to the WooCommerce Admin AreaRead More
Share Link to a Draft Post in WordPress
Learn how to create sharing links for Draft Posts in WordPress with some simple PHP code. These links can be used to share draft content with non-logged-in users. We’ll make a small meta box on the Edit Post page too, so it’s super easy to copy the draft post link.
Share Link to a Draft Post in WordPressRead More
Display Taxonomy Terms in an Indexed List
List taxonomy terms in the style of an index, with permalinks to each of the terms. It’s a customisable and easy-to-use shortcode. Handy for use in sidebars, or as part of a dedicated index page.
Display Taxonomy Terms in an Indexed ListRead More
The Glide.js library does all the hard work for us. We just need to create an unordered list in HTML, reference the JavaScript and CSS files, then pass our options to Glide.js.
tipThis is responsive. Resize your browser down to a mobile device size and see how the number of visible slides changes for a better-fit.
Getting Started – The Plan
The main PHP code breaks down into two functions:
- Enqueue the assets (JavaScript and CSS files) for Glide.js and our own bits-and-bobs.
- Process the shortcode and return a HTML string based on our options.
Because we might want multiple carousels on any page, we need each carousel to be able to have its own options… Post Type, the number of slides to show, etc. So we’ll be using custom data attributes to pass the options to the browser in <div> tags wrapped around each Glide.js carousel.
Before starting, make sure your site is using a custom child theme, because we want to keep our functions.php, and our theme directory, clean.
Let’s Write Some Code
We’re going to add a new PHP file to the custom child theme’s main folder, and we’re going to create a directory in there to hold Glide.js and our CSS/JS files.. In your custom child theme’s main folder, create a new file called wpt-carousel.php and paste the following into it – it’s just some scaffolding code to help us get things started:
<?php

/**
 * WP Tutorials Carousel (WPTC)
 *
 * https://wp-tutorials.tech/add-functionality/responsive-post-product-scrolling-carousel/
 */

// Block direct access.
defined('WPINC') || die();


/**
 * Register CSS and scripts for Glide.js and our own visuals. You can safely
 * call this function multiple times - it will only register the assets
 * the first time it's called.
 */
function wptc_enqueue_frontend_assets_if_not_already_enqueued() {
	global $wpt_carousel_have_assets_been_queued;

	if (is_null($wpt_carousel_have_assets_been_queued)) {
		// Code will go in here...
		// ...

		$wpt_carousel_have_assets_been_queued = true;
	}
}

/**
 * The function that does all the actual work of returning a HTML string to
 * define the carousel.
 */
function do_shortcode_wpt_carousel($atts = null) {
	// Code will go in here...
	// ...

	return '<p>Hello World</p>';
}
add_shortcode('wpt_carousel', 'do_shortcode_wpt_carousel');
Now open your custom child theme’s functions.php file and add the following snippet to it:
/**
 * WP Tutorials Carousel (WPTC)
 */
require_once dirname(__FILE__) . '/wpt-carousel.php';
Save those two files and then create a piece of content (a page or a post) so you can test the new shortcode. Add a shortcode block, save the content and you should see the words “Hello World” rendered in the output.
That’s our scaffolding in-place, so now we can look at sorting out Glide.js and our assets.

Directory Structure
In your custom child theme’s folder, create a subfolder called wpt-carousel.
You’ll need to grab the source code for Glide.js (choose “.zip” if you’re unsure which format to use), extract it and go to the “dist” (distribution) folder. The documentation says we only really need to use the “core” CSS file and the minified JavaScript file, so copy “glide.core.min.css” and “glide.min.js” into the “wpt-carousel” folder.
Now create empty text files called “default-slide.php”, “wptc-frontend.css” and “wptc-frontend.js“.

| File | What it Does |
|---|---|
| default-slide.php | Template PHP/HTML file for rendering each of the slides. You can create different templates for different carousels, like a product slider or one for “latest news”. |
| glide.core.min.css | The core stylesheet for the Glide.js elements. |
| glide.min.js | The JavaScript that makes Glide.js work. |
| wptc-frontend.css | Our frontend styles. |
| wptc-frontend.js | Our JavaScript code to connect our HTML to Glide.js. It doesn’t do much, but it’s the link that makes it work in the browser. |
The Main Post Carousel Code :: The PHP Bit
This is the core of our shortcode. Completely replace the contents of wpt-carousel.php with the following – it’s chunky, but show no fear and dive in:
<?php

/**
 * WP Tutorials Carousel (WPTC)
 *
 * A scrollable post (any post type) responsive carousel with good SEO.
 *
 * https://wp-tutorials.tech/add-functionality/responsive-post-product-scrolling-carousel/
 *
 */

// Block direct access.
defined('WPINC') || die();

const WPTC_GLIDEJS_VERSION = '3.4.1';
const WPTC_DEFAULT_TEMPLATE_NAME = 'default-slide';

/**
 * Register the shortcode.
 */
add_shortcode('wpt_carousel', 'do_shortcode_wpt_carousel');

/**
 * Register CSS and scripts for glide.js and our own visuals. You can safely
 * call this function multiple times - it will only register the assets
 * the first time it's called.
 */
function wptc_enqueue_frontend_assets_if_not_already_enqueued() {
	global $wpt_carousel_have_assets_been_queued;

	if (is_null($wpt_carousel_have_assets_been_queued)) {
		$base_url = get_stylesheet_directory_uri() . '/' . pathinfo(__FILE__, PATHINFO_FILENAME) . '/';
		$version = wp_get_theme()->get('Version');

		// The 'true' at the end lets glidejs be included in the footer.
		wp_enqueue_script('glide', $base_url . 'glide.min.js', array(), WPTC_GLIDEJS_VERSION, true);
		wp_enqueue_script('wptc-frontend', $base_url . 'wptc-frontend.js', array('jquery', 'glide'), $version, true);

		wp_enqueue_style('glide-core', $base_url . 'glide.core.min.css', array(), WPTC_GLIDEJS_VERSION);
		wp_enqueue_style('wptc-frontend', $base_url . 'wptc-frontend.css', array('glide-core'), $version);

		$wpt_carousel_have_assets_been_queued = true;
	}
}

/**
 * The function that does all the actual work of returning a HTML string to
 * drive the carousel.
 */
function do_shortcode_wpt_carousel($atts = null) {
	$html = '';

	if (is_admin()) {
		// Don't do anything.
	} elseif (wp_doing_ajax()) {
		// Don't do anything.
	} else {

		// Check what options have been passed to the shortcode.
		$args = shortcode_atts(
			array(
				'post_type' => 'post',
				'count' => 10,
				'perview' => 3,
				'type' => 'carousel',
				'controls' => 'off',
				'bullets' => 'off',
				'autoplay' => 3000,
				'hoverpause' => 'on',
				'template' => WPTC_DEFAULT_TEMPLATE_NAME,
			),
			$atts
		);

		// Sanity check the shortcode parameters.
		$base_dir_name = trailingslashit(dirname(__FILE__));
		$template_file_name = 'wpt-carousel/' . $args['template'] . '.php';

		$classes = array('wptc-container', 'wptc-' . $args['post_type']);
		$classes = apply_filters('wpt_carousel_classes', $classes);

		if (($per_view = intval($args['perview'])) <= 0) {
			$per_view = 3;
		}

		if (($autoplay = intval($args['autoplay'])) < 0) {
			$autoplay = false;
		}

		// All options are here: https://glidejs.com/docs/options/
		$glide_options = array(
			'type' => $args['type'],
			'perView' => $per_view,
			'autoplay' => $autoplay,
			'hoverpause' => filter_var($args['hoverpause'], FILTER_VALIDATE_BOOLEAN),
			'breakpoints' => array(
				'576' => array(
					'perView' => 1,
				),
				'768' => array(
					'perView' => 2,
				),
			),
		);

		wptc_enqueue_frontend_assets_if_not_already_enqueued();

		$html .= sprintf(
			'<div class="%s" data-glide-options="%s" style="opacity: 0.0;">',
			implode(' ', $classes),
			esc_attr(json_encode($glide_options))
		);

		// Create our WP_Query object so we can run a WordPress loop.
		$query_args = array(
			'post_type' => sanitize_title($args['post_type']),
			'posts_per_page' => intval($args['count']),
			'post_status' => 'publish',
		);
		$query = new WP_Query($query_args);

		if ($query->have_posts()) {
			$html .= '<div class="glide">';

			// Start the Glide track = which contains the slides.
			$html .= '<div class="glide__track" data-glide-el="track">';
			$html .= '<ul class="glide__slides">';
			while ($query->have_posts()) {
				$query->the_post();

				$html .= '<li class="glide__slide">';
				$html .= '<div class="wptc-item">';

				if (!is_readable($base_dir_name . $template_file_name)) {
					$html .= sprintf(
						'<span class="error">Template File Error<br />%s</span>',
						$template_file_name
					);
				} else {
					ob_start();
					include $template_file_name;
					$html .= ob_get_clean();
				}

				$html .= '</div>'; // .wptc-item
				$html .= '</li>'; // .glide__slide
			}
			$html .= '</ul>'; // .glide__slides
			$html .= '</div>'; // .glide__track

			// See the Glide.js documentation for how to create controls and
			// bullets. It's pretty easy.
			if (filter_var($args['controls'], FILTER_VALIDATE_BOOLEAN)) {
				// Render the controls HTML in here...
			}

			if (filter_var($args['bullets'], FILTER_VALIDATE_BOOLEAN)) {
				// Render the bullets HTML in here...
			}

			$html .= '</div>'; // .glide

			// It's very important to call wp_reset_query() after running a
			// WordPress loop.
			wp_reset_query();
		}

		$html .= '</div>'; // .wptc-container
	}

	return $html;
}
Although it’s a big lump of code, there’s really not much to it… The function wptc_enqueue_frontend_assets_if_not_already_enqueued() does exactly what it says, and should be easy enough to read.
tipDon’t be shy about using long names for your functions and variables. If it makes the code easy to read and reduces ambiguity, it’s a good thing.
The Core Logic
The main function for the carousel is do_shortcode_wpt_carousel() and it breaks down like this:
- If we’re in the admin area or running an AJAX query (i.e. if we’re not rendering frontend HTML) then don’t do anything.
- Enqueue the stylesheets and JavaScript.
- Parse the shortcode options, which come through in the
$attsarray.- Use shortcode_atts() to provide sensible default values for unspecified parameters.
- Create an array called
$glide_options, which we pass through to the frontend in a custom data attribute.- Our JavaScript code will turn this into an object that we pass directly into the Glide() constructor.
- Here are the options you can set in
$glide_options: Glide.js Options
- Open our containing
<div>tag and set thedata-glide-optionscustom data attribute with our$glide_optionsarray, serialised as a JSON string.- Taking a PHP array, turning it into a JSON string and then escaping the string into an attribute is a common way of getting PHP data into JavaScript.
- Inline version:
data-my-thingy="<?php echo esc_attr(json_encode($my_php_array_data)); ?>"
- Create
$query_argswhich we’ll pass into a WP_Query object to drive our WordPress loop.- There are lots of options you can put in here, and it’s the heart of querying WordPress content.
- If the WP_Query object has any posts, then enter the loop now and render an unordered list, where each list items is a carousel slide.
- We include a template file to render the actual slides. If
$template_file_namecan’t be read, then add an error message to the HTML to make the problem easy to fix.
- We include a template file to render the actual slides. If
- importantAfter the loop, call
wp_reset_query()so that WordPress knows we’ve finished doing stuff with the global$postobject.
The Slide/Item Template
Because we’re including a PHP file for the individual slides, you’ll need a PHP file for that, too. Open wpt-carousel/default-slide.php and paste the following into it:
<?php

// Block direct access.
defined('WPINC') || die();

?><div class="thumbnail">
	<?php the_post_thumbnail('medium');?>
	<h2 class="post-title"><?php the_title();?></h2>
</div>
<div class="post-excerpt"><?php
the_excerpt();

printf(
	'<a href="%s" title="%s" class="button"><span class="screen-reader-text">%s</span>%s</a>',
	esc_url(get_the_permalink()),
	esc_attr(get_the_title()),
	esc_attr(get_the_title()),
	esc_html__('Read More', 'wp-tutorials')
);
?></div>
tipYou can do loads of customisation and SEO optimisation in here. Using link text like “Read More” and “Click Here” is considered bad practise, because website crawlers can’t derive any context for the target URL. Here, we’re setting the title property of our <a> element to give the link specific context. We’re also adding a <span> with a screen-reader hint. You could also use an aria-label and do all sorts of screen-reader accessibility stuff.
Add Some Style
The CSS is pretty straightforward and you can adjust it however you want. Paste this into wpt-carousel/wptc-frontend.css.
/**
 * WP Tutorials Carousel - Frontend
 */

/** Required to make the carousel work. */

.wptc-container {
    padding:  1em;
    transition: 0.3s;
}

.wptc-container .glide__slides {
    margin-left:  0;
}

.wptc-container .glide__slide {
    display:  block;
    height:  inherit;
}

.wptc-container li {
    margin-left:  0;
}

.wptc-item {
    display:  flex;
    flex-direction: column;
    align-items: stretch;
    border-radius:  1em;
    overflow:  hidden;
    justify-content: stretch;
    height:  100%;
    border:  2px solid #888;
    background-color:  white;
}

.wptc-item .error {
    padding:  1em;
    font-weight: bold;
    color:  red;
}

/** Change these to adjust the styles for your slides. */

.wptc-item .thumbnail {
    display:  block;
    flex:  1;
    position:  relative;
}

.wptc-item .post-title {
    position:  absolute;
    left:  0;
    bottom:  0;
    width:  100%;
    background-color:  rgba( 255, 255, 255, 0.80 );
    margin:  0;
    padding:  1.0rem;
    font-size:  18pt;
}

.wptc-item .thumbnail .wp-post-image {
    width:  100%;
    height:  100%;
    height:  17em;
    object-fit: cover;
}

.wptc-item .post-excerpt {
    background-image:  linear-gradient( to bottom right, transparent, #eee);
    padding:  1.05rem;
    line-height: 1.25em;
    flex:  1;
    display:  flex;
    flex-direction: column;
    justify-content: space-between;
    align-items: flex-start;
}

.wptc-item .post-excerpt .button {
    display:  inline-block;
}
tipNotice how we set the transition of “.wptc-container” to 0.3s – this is so that we can load the carousel container(s) with zero opacity (totally transparent) and then fade them in by just setting the opacity to 1.0.
Enable the Carousel in the Browser
Now we’ve got the HTML rendered in the browser, and the assets are enqueued too, we need a bit of custom JavaScript to glue it all together. The first thing we should really do is check that our JavaScript file has been loaded by the browser.
- Reload your test content page/post. There should be a blank space where the carousel is, because it is still transparent.
- View the page source.
- Search for “wptc-frontend-js” in a
<script>element. If the script is being loaded correctly, you should see something like this in the page source:
<script
   src='https://example.org/wp-content/themes/mytheme/wpt-carousel/wptc-frontend.js?ver=1.0.1'
   id='wptc-frontend-js'
>
</script>
When you’ve confirmed this is in the page source, close the page source window/tab so you’ve got your main WP content in front of you again, and open your browser’s DevTools – usually with the [F12] key. The JavaScript console lets you error messages that might pop-up. We can also send ourselves useful diagnostic messages in the JavaScript console.
Edit the wpt-carousel/wptc-frontend.js file in your custom child theme and paste the following into it:
/**
 * WP Tutorials Carousel - Frontend
 *
 * https://wp-tutorials.tech/add-functionality/responsive-post-product-scrolling-carousel/
 */
(function($) {
    'use strict';

    $(window).on('load', function() {
        console.log('WP Tutorials Carousel : load');

        $('.wptc-container').each(function(index, el) {
            var options = $(this).data( 'glide-options');
            // console.log( options );
            new Glide( $(this).find( '.glide')[0], options ).mount();
        });

        $('.wptc-container').css( 'opacity', '1.0' );
    });
})(jQuery);
This simple script works like this this:
- When the (browser) window raises the “load” event…
- Send the string “WP Tutorials Carousel : load” to the JavaScript console so we know our script is running.
- For each DOM element that has the “wptc-container” CSS class…
- Extract the
data-glide-optionscustom data attribute. - If you want to see the contents of this object, uncomment the line that calls
console.log( options ) - Find the first child DOM element that has the “glide” CSS class and use it to create a new
Glide()object.- This is taken from the Glide.js documentation – Setup
- Extract the
- For each DOM element that has the “wptc-container” CSS class, set the opacity to 1.0 (100%).
- Because we set a transition of 0.3s in the “wptc-container” CSS class definition, the carousel container will take a third of a second to fade in.
Test It
That should be it! In your browser, do a force reload (bypass the cache) to make sure the browser loads the latest version of all your assets – usually [Ctrl][Shift][R], but it depends on your browser.
Check it out on mobile devices – phones and tablets. Make sure this doesn’t work only on your laptop… but that it works well for everybody.
Troubleshooting
If something’s not working, the first thing to check is the JavaScript console. This will show if there was a problem loading JS/CSS assets. It will also show if there were any errors calling the Glide.js library.
Use the WordPress plugin Query Monitor to help you pick up on any PHP errors. You can uninstall it when you’ve finished with it.
If things are sort-of working, but the page elements are being rendered strangely, check your HTML is valid – you might be missing a closing element or a closing quote for an attribute. the standard W3C Validator will help you with this. There’s no excuse for having errors in your website’s HTML and just hoping the browser will clean up your mess.
Going Further
This code should be easy to extend in several ways.
- Pass the template attribute into the shortcode and experiment with different item templates.
- If you’re running a WooCommerce shop, set the post type to “product” and add a new template file. Make your WooCommerce shop look different to everybody else’s.
- Look through the Glide.js options and add things like navigation buttons and bullets to the carousel. I’ve put some placeholders into wpt-carousel.php to get you started.
- Move it out of your theme and into a plugin, so you can use it on your other projects really easily.
Have you found some cool uses for this code in your websites? Let us know in the comments below 😎 👇 👇 👇

